Why Does My Machine Needle Keep Breaking? Causes & How to Fix It?
Is your embroidery machine needle breaking again and again? Needle breakage can be caused by many factors, including the wrong needle size, incorrect thread tension, poor hooping, damaged needles, excessive stitch density, or machine timing issues. In some cases, the real problem can be an improperly digitized embroidery design. In this guide, we explain the most common causes of embroidery needle breakage, practical ways to fix them, and how professional embroidery digitizing can help prevent these problems and improve stitch quality.
Machine embroidery can produce beautiful, professional results, but frequent needle breakage can quickly become frustrating. If your embroidery machine needle keeps breaking, the problem may not always be the needle itself. Incorrect needle size, improper installation, unsuitable thread, excessive embroidery density, hooping problems, machine timing, or even an improperly digitized design can all contribute to needle breakage.
Understanding the actual cause is important because repeatedly replacing broken needles without identifying the underlying problem can waste both time and money and may also affect the quality of your embroidery.
In this guide, we will explain the most common reasons why embroidery machine needles break, how to troubleshoot the problem, and what you can do to prevent repeated needle breakage.
What Causes an Embroidery Machine Needle to Break?
There are several possible causes of needle breakage during machine embroidery. Some are related to the machine itself, while others are related to the needle, thread, fabric, hooping, or embroidery design.
The most common causes include:
Incorrect needle size
Wrong needle type
Needle installed incorrectly
Damaged, bent, or worn needle
Incorrect thread tension
Poor-quality or unsuitable embroidery thread
Incorrect thread path
Fabric not hooped correctly
Excessive stitch density
Incorrect underlay
Poor digitizing
Very small stitches
Design registration problems
Embroidery machine timing issues
Needle hitting the presser foot, hoop, needle plate, or other machine parts
Improper machine maintenance
Let's look at each cause in detail.
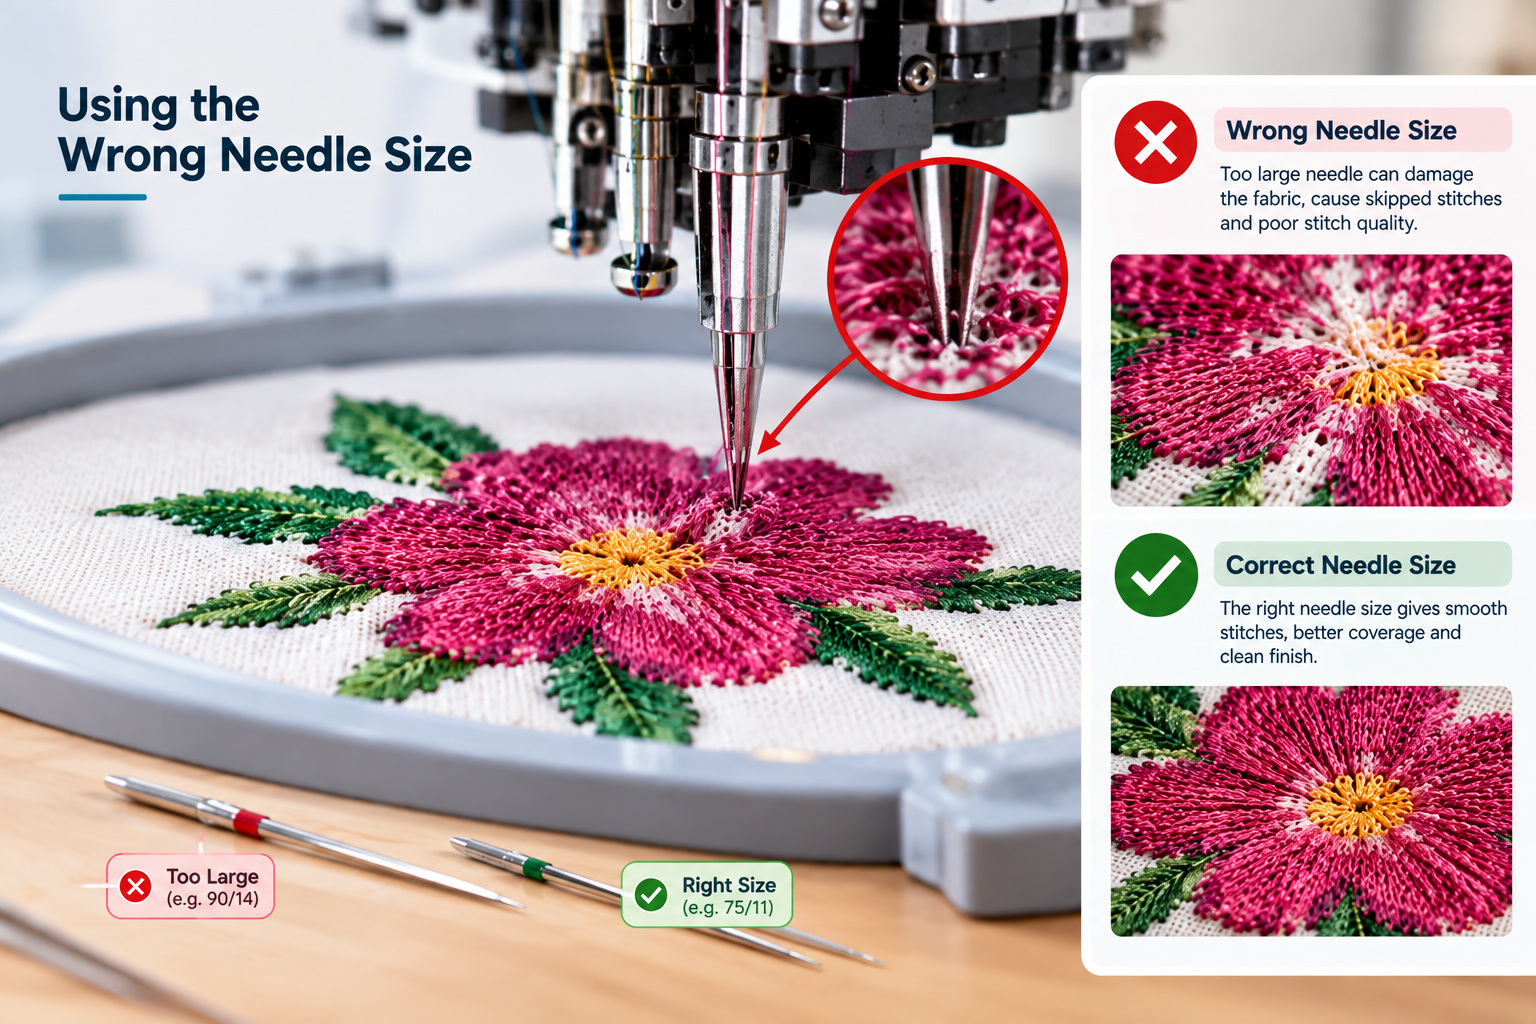
Using the Wrong Needle Size
One of the most common reasons for needle breakage is using the wrong needle size for the thread and fabric.
Embroidery needles are available in different sizes. The correct size depends on factors such as:
Fabric type
Thread thickness
Design density
Type of embroidery
Machine specifications
A needle that is too small may struggle to carry thicker thread through the fabric. This can increase resistance and cause the needle to bend or break.
On the other hand, using a very large needle on delicate fabric can create unnecessarily large holes and may affect the final embroidery appearance.
How to Fix It
Always select the needle size according to the fabric and thread being used. Check the recommendations provided by your embroidery machine and thread manufacturer.
If you are working with a dense design or heavier thread, you may need a different needle size than you would use for a light design on a thin fabric.
2. The Needle May Be Bent or Damaged
A needle does not have to be visibly broken to cause problems.
A slightly bent needle can move away from its normal path and hit:
The needle plate
Presser foot
Hoop
Bobbin area
Other machine components
This can result in repeated needle breakage.
A damaged needle can also produce poor-quality stitches, thread breaks, skipped stitches, and uneven embroidery.
How to Fix It
Replace the needle whenever you notice:
A bent needle
A damaged needle tip
Unusual needle noise
Repeated thread breaks
Skipped stitches
Needle strikes
Do not continue using a needle simply because it still appears usable.
3. The Needle Is Installed Incorrectly
Embroidery machine needles must be installed correctly. If the needle is not inserted completely or is facing the wrong direction, it may not follow the correct path.
An incorrectly installed needle can come into contact with other machine components and break during stitching.
How to Fix It
When replacing the needle:
Stop the machine.
Follow the machine manufacturer's safety instructions.
Remove the old needle.
Insert the new needle in the correct orientation.
Push it fully into the needle bar.
Tighten the needle screw properly.
Check that the needle is straight and correctly positioned.
If you are unsure about the correct needle position, consult your machine manual.
4. Incorrect Thread Tension
Thread tension is another important factor.
If the upper thread tension is too tight, the thread may experience excessive resistance while stitching. This can affect the movement of the needle and increase stress on the thread and needle.
Incorrect tension can also cause:
Thread breaks
Uneven stitches
Bobbin thread showing on top
Loops
Poor stitch formation
How to Fix It
Check your upper and bobbin thread tension according to your machine's recommended settings.
Avoid making large tension adjustments without testing the result. Make small changes and run a test design after each adjustment.
5. Poor-Quality or Incorrect Thread
Not all embroidery threads behave the same way.
Thread quality, thickness, material, and condition can affect the stitching process. Old, damaged, tangled, or unsuitable thread may create additional resistance.
This can result in:
Thread breaks
Needle stress
Uneven stitches
Poor embroidery quality
How to Fix It
Use good-quality embroidery thread that is appropriate for your machine and design.
Also check the thread spool for:
Knots
Damage
Excessive lint
Tangling
Incorrect winding
Make sure the thread follows the machine's thread path correctly.
6. The Thread Path Is Incorrect
Sometimes the needle is perfectly fine, but the thread has not been threaded correctly.
If the thread misses a guide or tension mechanism, it can create excessive tension during stitching.
This may cause the thread to pull suddenly and can contribute to needle problems.
How to Fix It
Completely rethread the machine according to the manufacturer's instructions.
Pay particular attention to:
Thread guides
Tension discs
Take-up lever
Needle bar area
Final needle thread guide
If the machine starts working normally after rethreading, the original problem may have been incorrect threading.
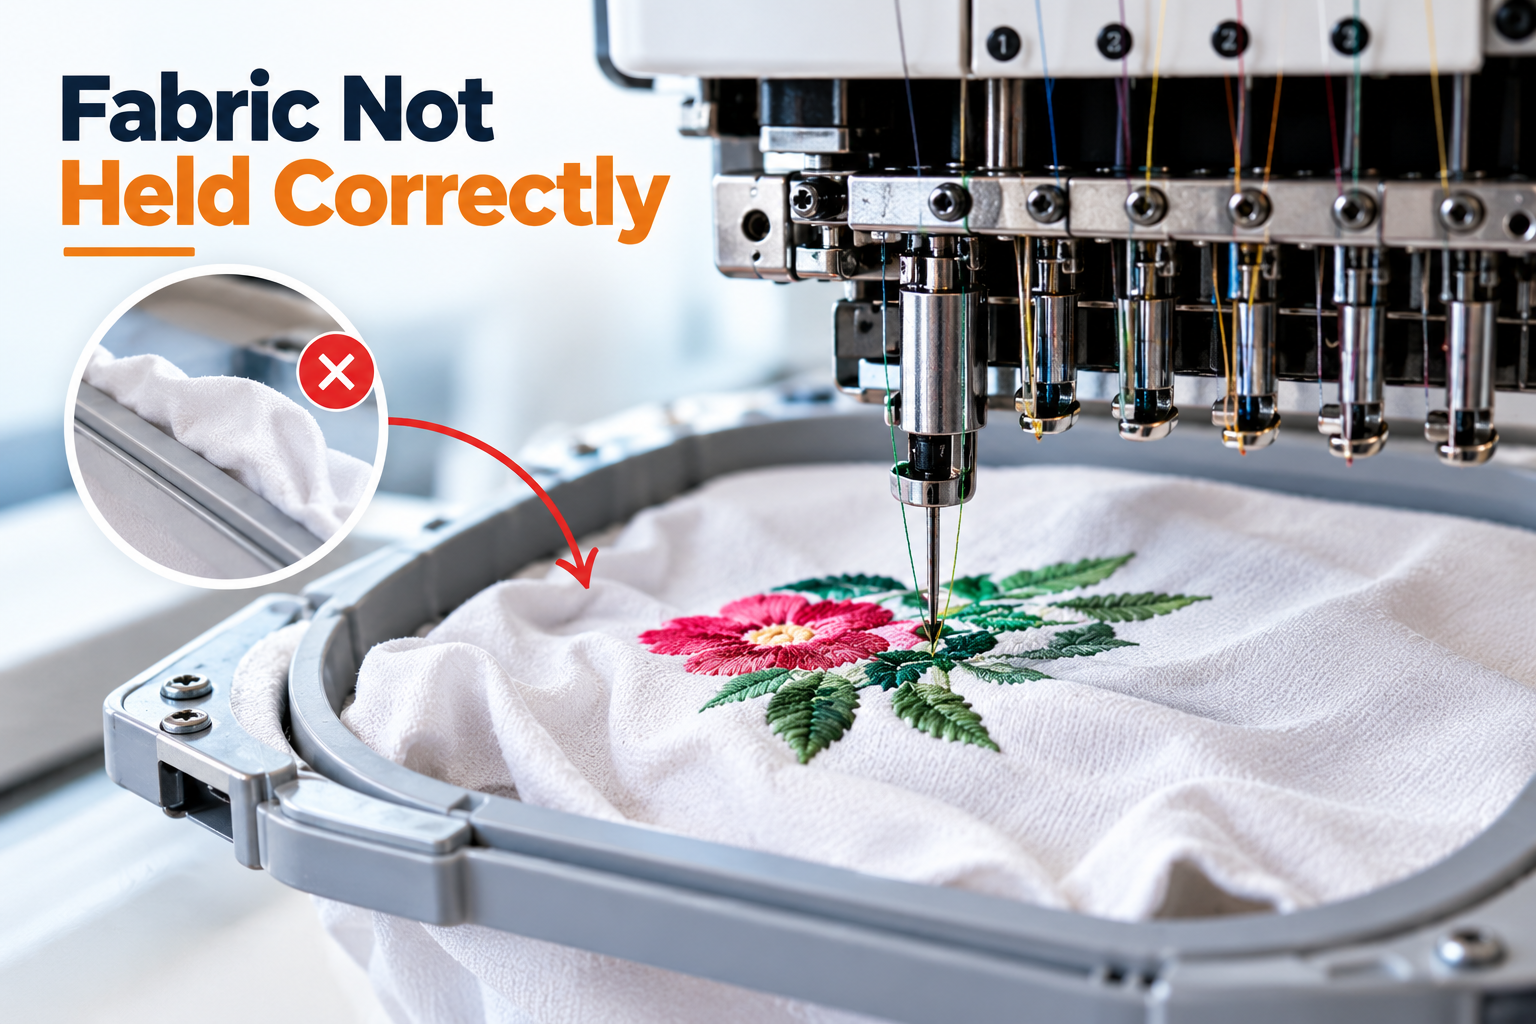
7. The Fabric Is Not Hooped Correctly
Proper hooping is essential for machine embroidery.
If the fabric is too loose inside the hoop, it may move during stitching. If it is stretched excessively, it can also create problems when removed from the hoop.
Movement between the fabric and stabilizer can increase resistance and affect stitch registration.
How to Fix It
Make sure the fabric and stabilizer are properly secured.
The fabric should be stable without being excessively stretched.
For difficult fabrics, use the appropriate stabilizer and hooping method for the material.
8. Incorrect or Excessive Stitch Density
This is one of the most important causes of needle problems—and it is directly related to embroidery digitizing.
When too many stitches are placed into a small area, the needle has to penetrate the same area repeatedly.
For example, if a small section of a design contains excessive stitch density, the needle may repeatedly enter an already heavily stitched area.
This can cause:
Needle deflection
Needle bending
Needle breakage
Thread breaks
Excessive stiffness
Fabric damage
How to Fix It
The embroidery file should be properly digitized according to the design size, fabric, thread, and embroidery technique.
Professional Embroidery Digitizing Services can help ensure that stitch density, stitch direction, underlay, and other settings are appropriate for production.
A good digitized file is not simply an image converted into stitches. It requires decisions about how the design will actually be stitched by the embroidery machine.
9. Poor Underlay Settings
Underlay stitches are used to support the top layer of embroidery.
They help stabilize the fabric and provide a foundation for the visible stitches.
However, inappropriate underlay can create excessive stitching in certain areas. If too many stitches are concentrated in one location, the needle may repeatedly penetrate a dense area.
How to Fix It
Underlay should be selected according to:
Fabric type
Design size
Stitch type
Density
Shape
Embroidery application
A professional digitizer should adjust underlay settings rather than applying the same settings to every design.
10. Very Small Stitches Can Cause Needle Problems
Extremely short stitches can create unnecessary needle penetrations.
When a design contains many tiny stitches close together, the machine may repeatedly insert the needle into nearly the same location.
This can increase:
Needle movement
Thread friction
Fabric stress
Needle heat
Risk of needle breakage
How to Fix It
The embroidery file should be reviewed and optimized to eliminate unnecessary short stitches.
A professional digitizing process considers stitch length as well as stitch density and stitch direction.
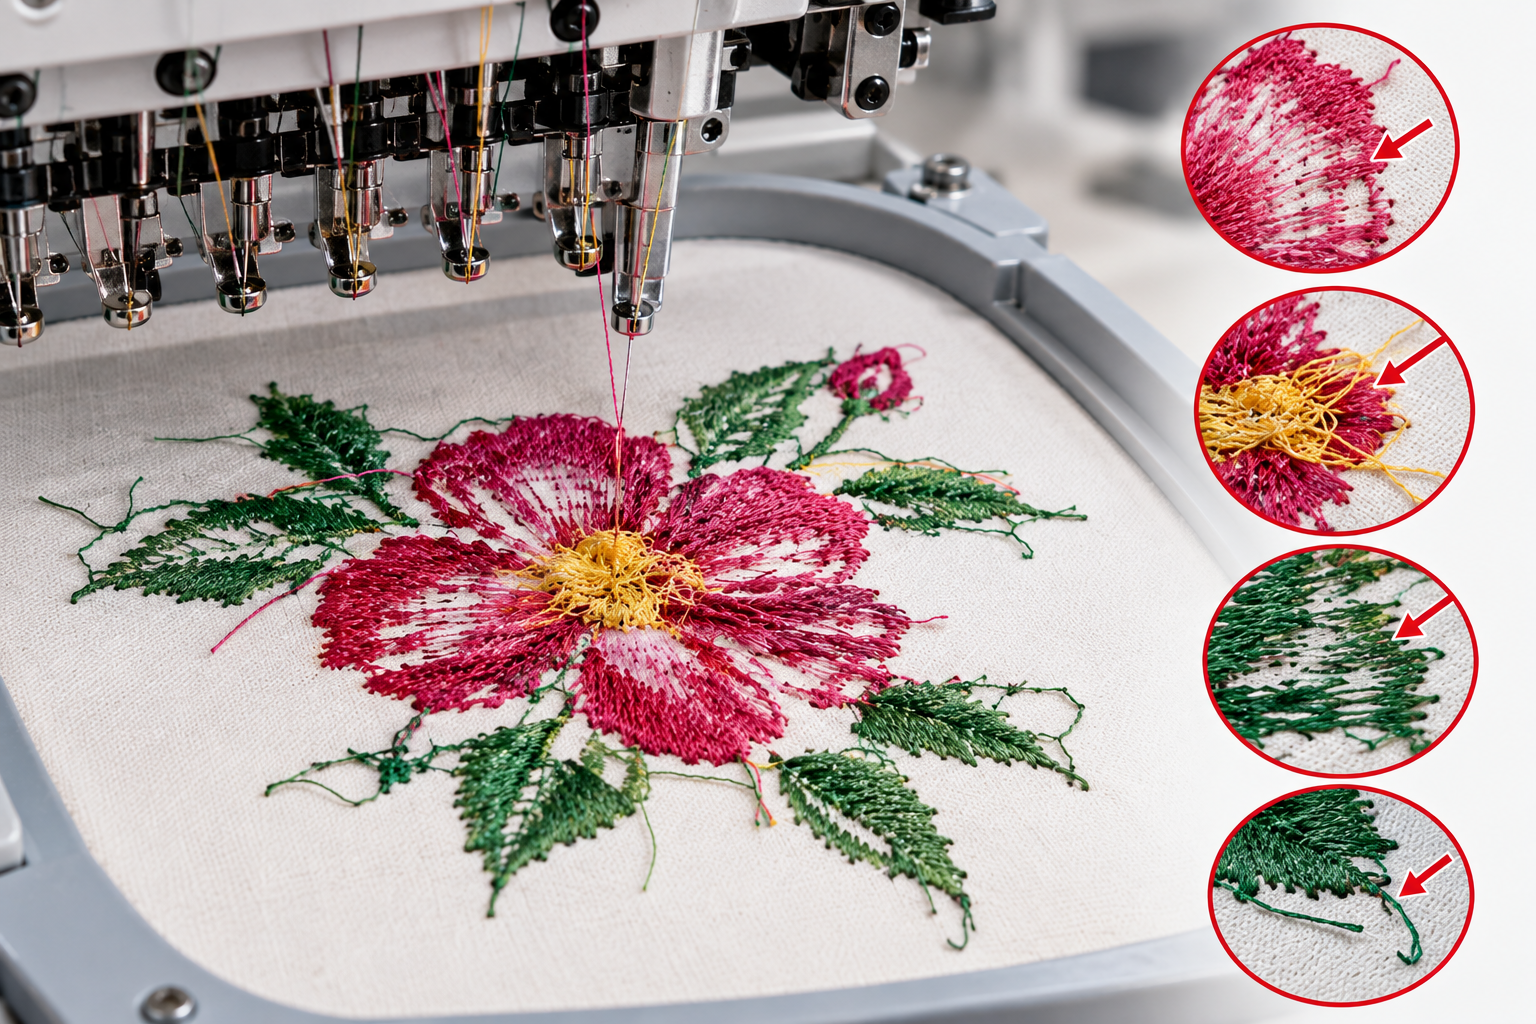
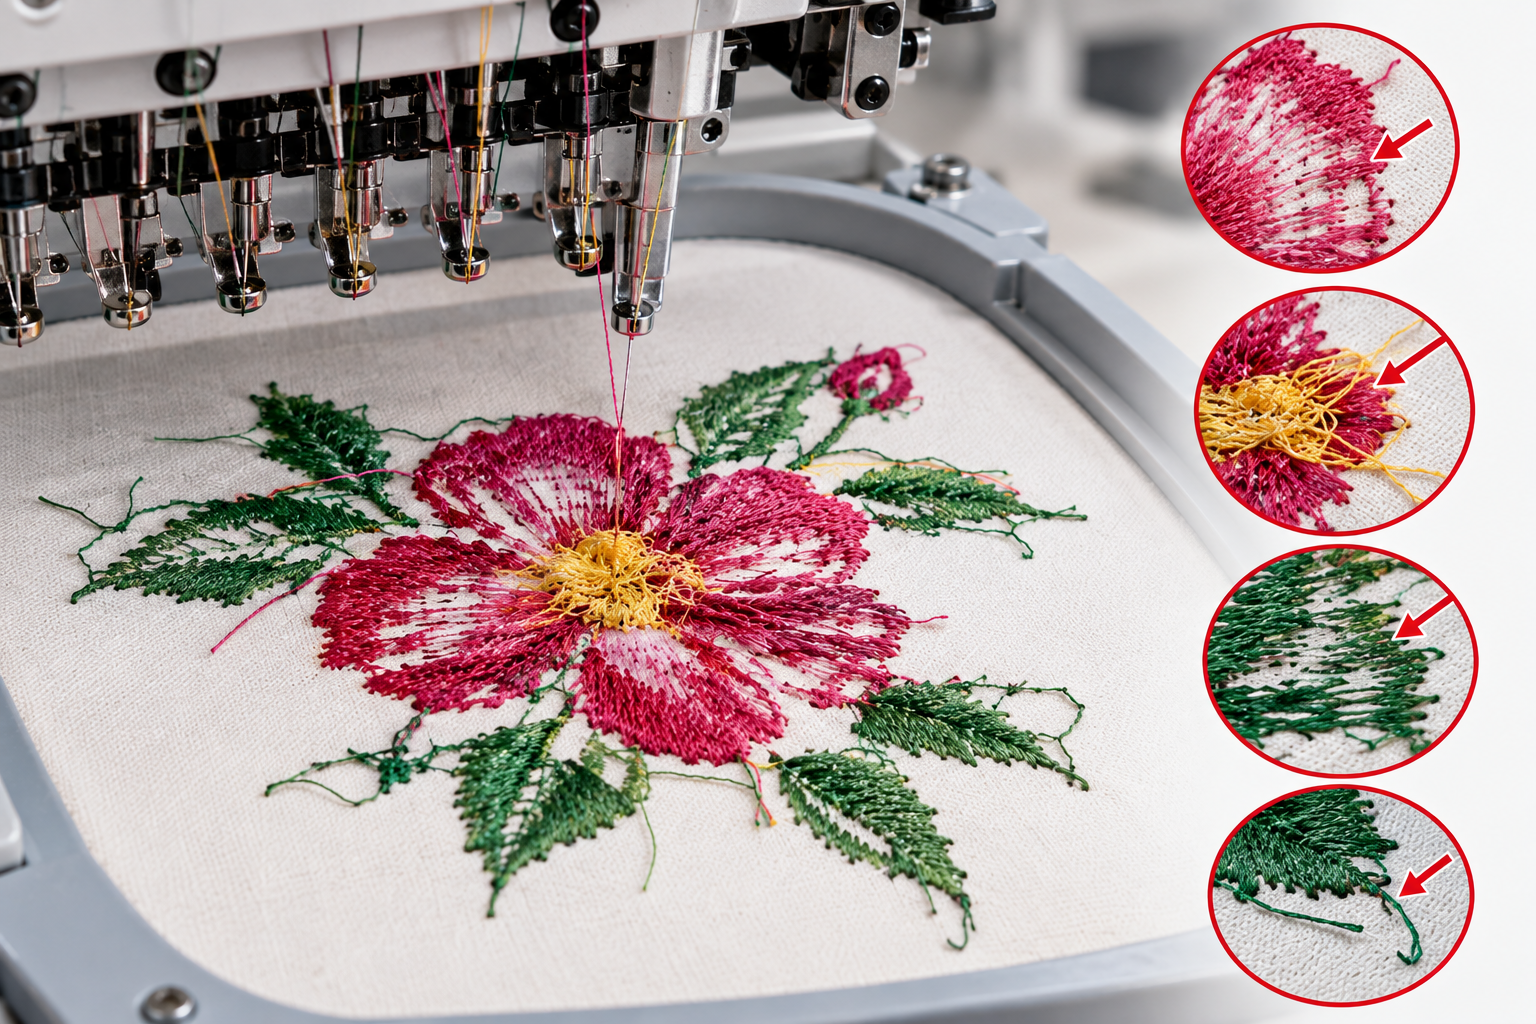
The Embroidery Design May Be Poorly Digitized
Sometimes the machine itself is working correctly, but the embroidery file is the problem.
A design can look perfect on a computer screen while still producing poor results on an embroidery machine.
Poor digitizing may include:
Excessive density
Incorrect stitch direction
Too many unnecessary stitches
Poor sequencing
Incorrect underlay
Very short stitches
Excessive overlapping
Improper pull compensation
Poor registration planning
These issues can increase stress on the needle and thread.
For businesses producing embroidered logos, uniforms, caps, jackets, or promotional products, investing in a professionally digitized file can make a significant difference.
You can learn more about the complete process in our Professional Embroidery Digitizing Guide.
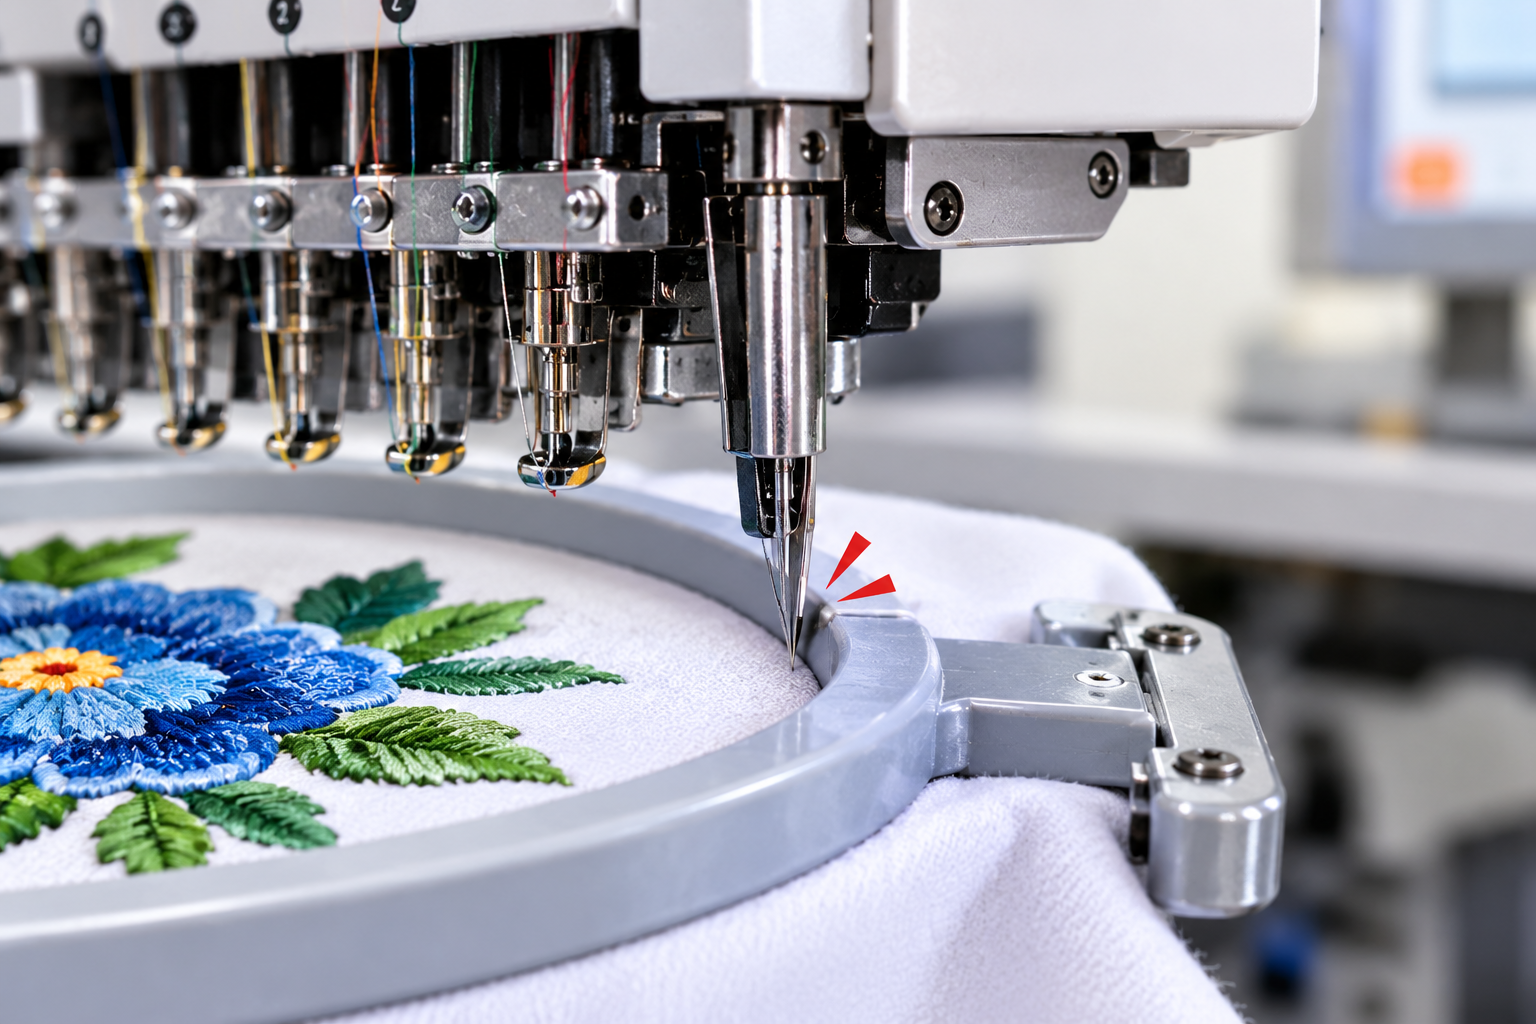
12. The Needle May Be Hitting the Hoop
If the embroidery design is positioned incorrectly or the hoop is not installed correctly, the needle can strike the hoop.
A needle striking a hard object can bend or break immediately.
How to Fix It
Before starting the machine:
Check the design position.
Confirm that the hoop is installed correctly.
Make sure the needle has sufficient clearance.
Check that the design does not extend outside the safe embroidery area.
Never continue operating the machine if the needle is repeatedly hitting the hoop.
13. Needle Plate or Presser Foot Problems
A damaged or incorrectly positioned needle plate can also cause needle strikes.
Similarly, if the presser foot is loose, damaged, or incorrectly positioned, the needle may contact it.
How to Fix It
Inspect the needle plate and presser foot for:
Scratches
Damage
Loose components
Incorrect positioning
Burrs or sharp edges
If you suspect a mechanical problem, have the machine inspected by a qualified technician.
14. Machine Timing Problems
If you have checked the needle, thread, tension, hooping, and design but the needle continues to break, the problem may be mechanical.
Embroidery machines depend on precise timing between the needle, hook, presser foot, and other components.
Incorrect timing can cause:
Needle strikes
Thread breaks
Skipped stitches
Poor stitch formation
Repeated needle breakage
How to Fix It
Do not attempt major timing adjustments without the appropriate technical knowledge.
Contact a qualified embroidery machine technician and have the machine inspected.
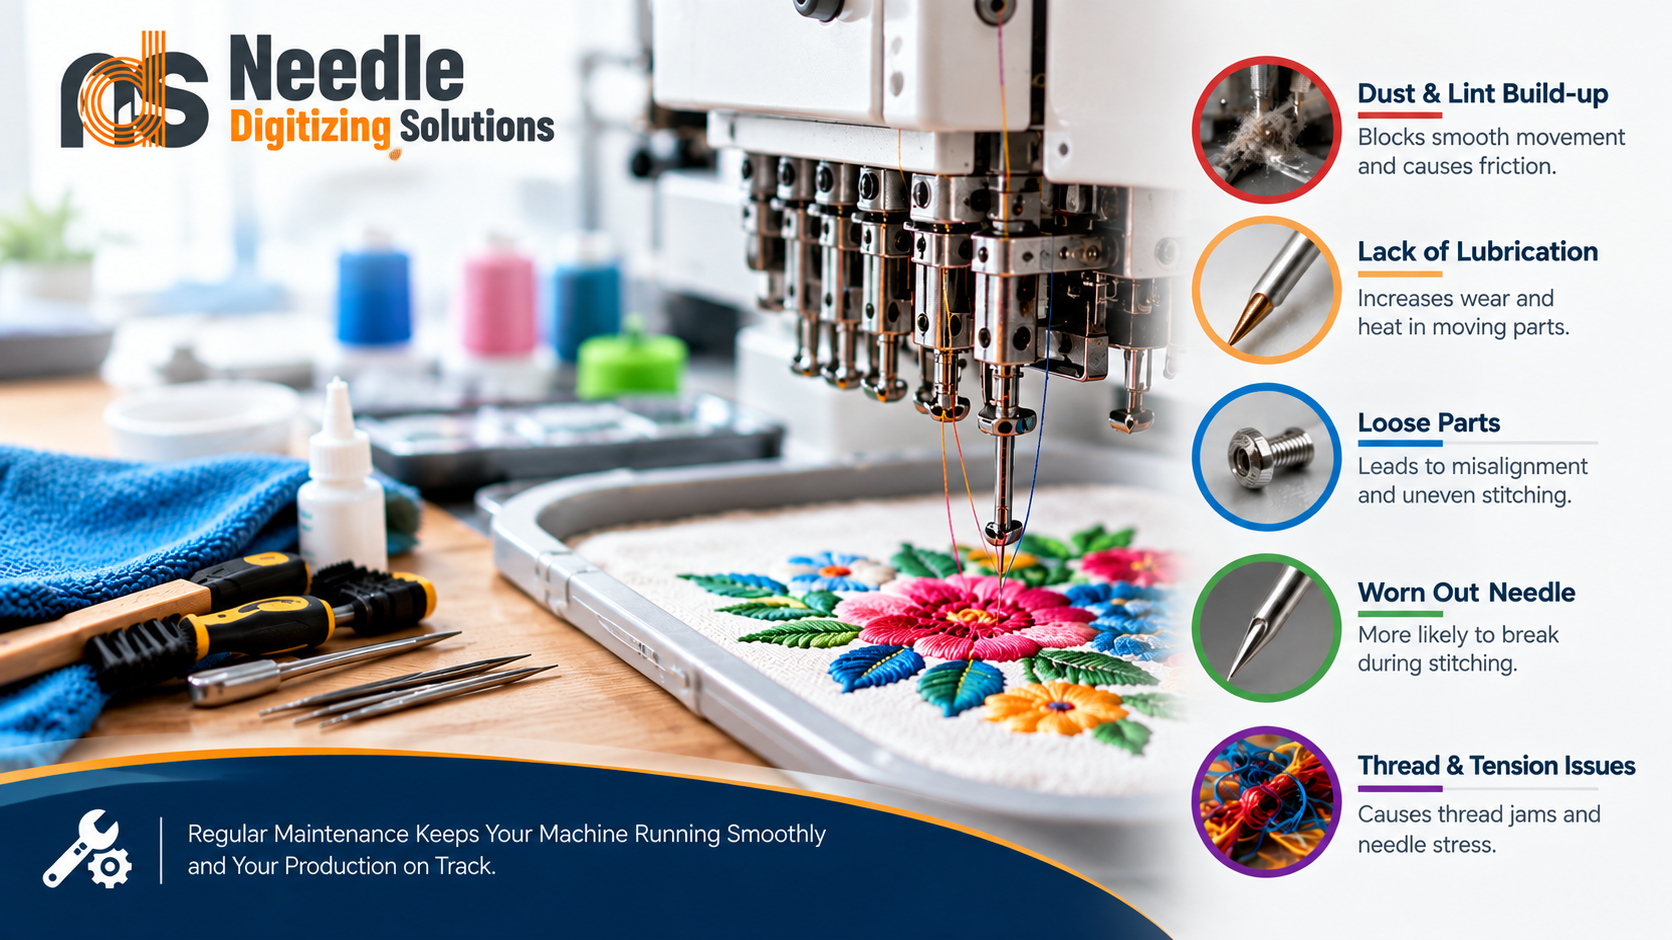
15. Lack of Machine Maintenance
Regular maintenance is important for consistent embroidery production.
Dust, lint, thread fragments, and lack of lubrication can affect machine performance.
A machine that has not been maintained properly may develop stitching problems that eventually contribute to needle or thread breakage.
How to Fix It
Follow the maintenance schedule recommended by your machine manufacturer.
Depending on the machine, maintenance may include:
Cleaning the bobbin area
Removing lint
Checking the needle area
Lubrication where required
Checking screws and components
Professional servicing
Always follow your machine manufacturer's maintenance instructions.
How to Troubleshoot Repeated Needle Breakage
If your needle keeps breaking, do not immediately assume that the needle is defective.
Use this simple troubleshooting process.
Step 1: Replace the Needle
Install a new needle of the appropriate type and size.
Step 2: Check Needle Installation
Make sure the needle is inserted fully and positioned correctly.
Step 3: Rethread the Machine
Follow the correct thread path from the spool to the needle.
Step 4: Check Thread Tension
Make sure the tension is appropriate for the thread and design.
Step 5: Check the Hoop
Make sure the fabric and stabilizer are properly secured.
Step 6: Run a Simple Test Design
Try stitching a simple design.
If the simple design works correctly, the problem may be related to the original embroidery file.
Step 7: Check the Digitized Design
Look for:
Excessive density
Very short stitches
Heavy overlapping
Poor underlay
Incorrect stitch direction
Problematic sequencing
Step 8: Check the Machine
If the problem continues across different designs, inspect the machine for mechanical issues.
How Professional Digitizing Can Help Prevent Needle Breakage
Embroidery digitizing plays an important role in production quality.
A professional digitizer doesn't simply trace artwork and convert it into stitches. The design must be planned according to the actual embroidery process.
Important considerations include:
Stitch Density
Density needs to be appropriate for the design and fabric.
Stitch Length
Unnecessarily short stitches should be avoided where possible.
Stitch Direction
Proper stitch direction helps control the appearance and behavior of embroidered areas.
Underlay
The correct underlay provides stability without creating unnecessary bulk.
Stitch Sequence
Proper sequencing can reduce unnecessary jumps, trims, and overlapping.
Pull Compensation
Appropriate pull compensation helps maintain the shape of the design during embroidery.
Fabric Consideration
The same design may require different digitizing settings when embroidered on different fabrics.
This is why professional Custom Embroidery Digitizing Services are important when consistent production quality is required.
Why the Same Design May Work on One Fabric but Fail on Another
Another common situation is that a design stitches perfectly on one garment but causes needle or thread problems on another.
This can happen because different fabrics behave differently during embroidery.
For example:
Cotton may require different settings from stretch fabric.
Caps require different digitizing considerations from flat garments.
Thick jackets may require different settings from lightweight shirts.
Knitted fabrics may need additional stabilization.
Therefore, embroidery digitizing should consider the final application rather than treating every fabric in the same way.
For more information, see our Embroidery Digitizing for Different Fabrics guide.
What Needle Should You Use for Machine Embroidery?
There is no single needle that is perfect for every embroidery project.
The appropriate needle depends on the application.
Consider:
Fabric thickness
Fabric type
Thread type
Thread weight
Design density
Machine recommendations
Always refer to your embroidery machine and needle manufacturer's specifications before selecting a needle.
If you frequently work with different materials, keeping a selection of appropriate embroidery needles can make troubleshooting easier.
How to Prevent Embroidery Needle Breakage
Prevention is easier than repeatedly dealing with broken needles.
Here are some practical habits that can help:
Use the Correct Needle
Select the appropriate needle type and size for the material and thread.
Replace Worn Needles
Do not continue using needles that are bent, damaged, or worn.
Maintain Proper Thread Tension
Check your tension whenever you change thread, fabric, or design.
Use Quality Thread
Good-quality embroidery thread can provide more consistent performance.
Hoop the Fabric Correctly
Use suitable stabilizer and ensure the material is secure.
Check Your Digitized Files
Poorly digitized designs can create unnecessary needle penetrations and excessive density.
Maintain Your Machine
Regular cleaning and servicing can prevent mechanical problems.
Test Before Production
Always test an important design before running a large production order.
When Should You Blame the Embroidery File?
A useful troubleshooting rule is to compare different designs.
If the needle breaks only when stitching one particular design, but other designs run normally, the embroidery file should be investigated.
The design may contain:
Excessive density
Too many stitches in one area
Very short stitches
Poor sequencing
Excessive overlapping
Incorrect underlay
Improper stitch settings
In this situation, simply changing the needle may not solve the problem.
The embroidery file may need professional editing or Embroidery Design Digitizing.
Final Thoughts
A machine embroidery needle that keeps breaking can have many causes. The problem may be as simple as an incorrectly installed needle or unsuitable thread, but it can also be related to hooping, tension, machine maintenance, or mechanical timing.
In many cases, however, the embroidery design itself should not be overlooked.
Excessive stitch density, very short stitches, poor underlay, incorrect sequencing, and other digitizing problems can increase stress on the needle and affect the overall stitch quality.
For professional embroidery production, a properly prepared and tested embroidery file is essential. Good digitizing considers the artwork, fabric, thread, stitch types, density, underlay, and final application before the design reaches the embroidery machine.
If you need a professional embroidery file prepared for your production requirements, explore our [Embroidery Digitizing Services] and contact Needle Digitizing for custom embroidery digitizing.
Frequently Asked Questions
Why does my embroidery needle keep breaking?
Common causes include an incorrect needle size, damaged needle, incorrect installation, thread tension problems, improper hooping, excessive stitch density, poor digitizing, or mechanical problems with the embroidery machine.
Can a digitized design cause needle breakage?
Yes. Excessive stitch density, very short stitches, heavy overlapping, inappropriate underlay, and poor sequencing can increase needle stress and may contribute to needle breakage.
How often should I change an embroidery needle?
Needle replacement frequency depends on the machine, fabric, design, thread, and production volume. Replace the needle when it becomes bent, damaged, worn, or when stitching problems begin to appear.
Why does my needle break only on one embroidery design?
If other designs stitch correctly but one specific design repeatedly causes needle breakage, examine that design for excessive density, short stitches, overlapping, or other digitizing problems.
Can changing the needle size solve the problem?
It can help when the needle size is inappropriate for the thread or fabric, but changing the needle alone will not solve problems caused by poor digitizing, incorrect tension, hooping, or machine timing.
Why does my needle break on thick embroidery designs?
Dense designs require many needle penetrations in a relatively small area. Excessive density or overlapping stitches can increase resistance and cause the needle to bend or break.
How can professional digitizing improve embroidery quality?
Professional digitizing optimizes stitch density, stitch direction, stitch length, underlay, sequencing, pull compensation, and other settings according to the design and fabric. This can help produce cleaner and more consistent embroidery.
Tags: