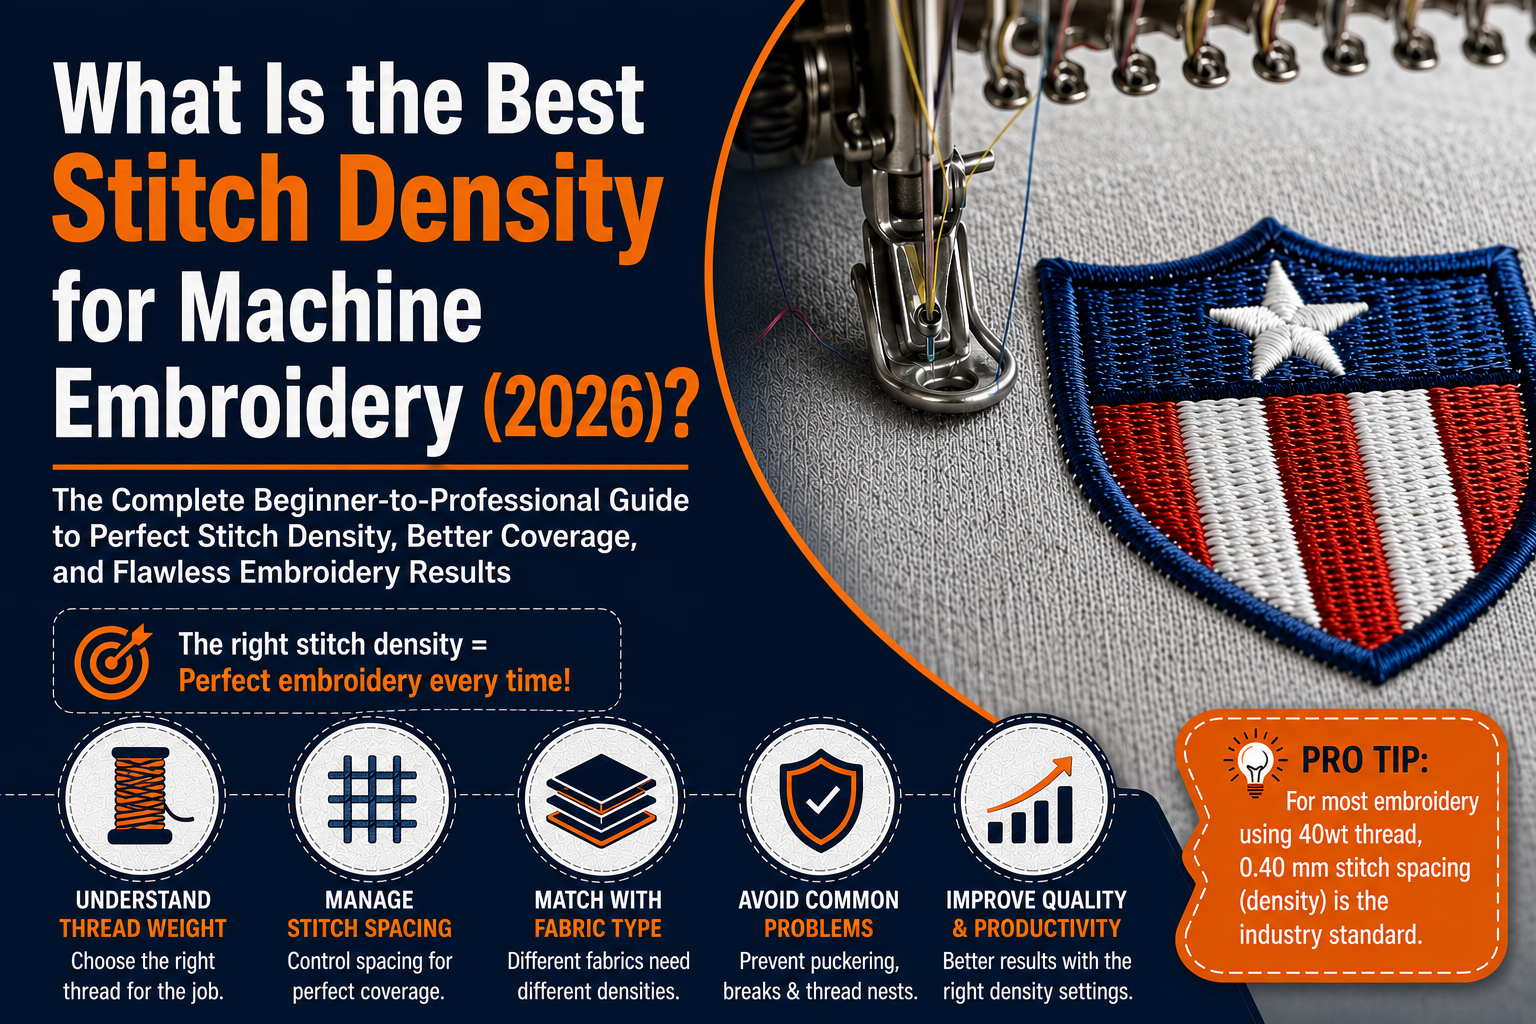
What Is the Best Stitch Density for Machine Embroidery? (Complete Guide for USA & Canada Embroidery Industry)
Learn the best stitch density for machine embroidery with this complete guide. Discover recommended stitch density settings for hats, polos, jackets, towels, and different fabrics to achieve professional embroidery results every time.

If you've ever wondered why one embroidery design looks crisp and professional while another appears stiff, puckered, or full of thread breaks, the answer often comes down to stitch density.
Stitch density is one of the most important settings in machine embroidery. Whether you're digitizing logos for corporate uniforms, creating custom patches, or embroidering promotional apparel, using the correct density ensures clean stitching, longer machine life, and satisfied customers.
For embroidery businesses across the United States and Canada, understanding stitch density is especially important because shops regularly work with a wide variety of fabrics—from heavyweight hoodies and denim jackets to lightweight performance polos and structured baseball caps.
In this comprehensive guide, we'll explain everything you need to know about embroidery stitch density, recommended settings for different fabrics, common mistakes, and professional tips used by experienced digitizers.
What Is Stitch Density in Machine Embroidery?
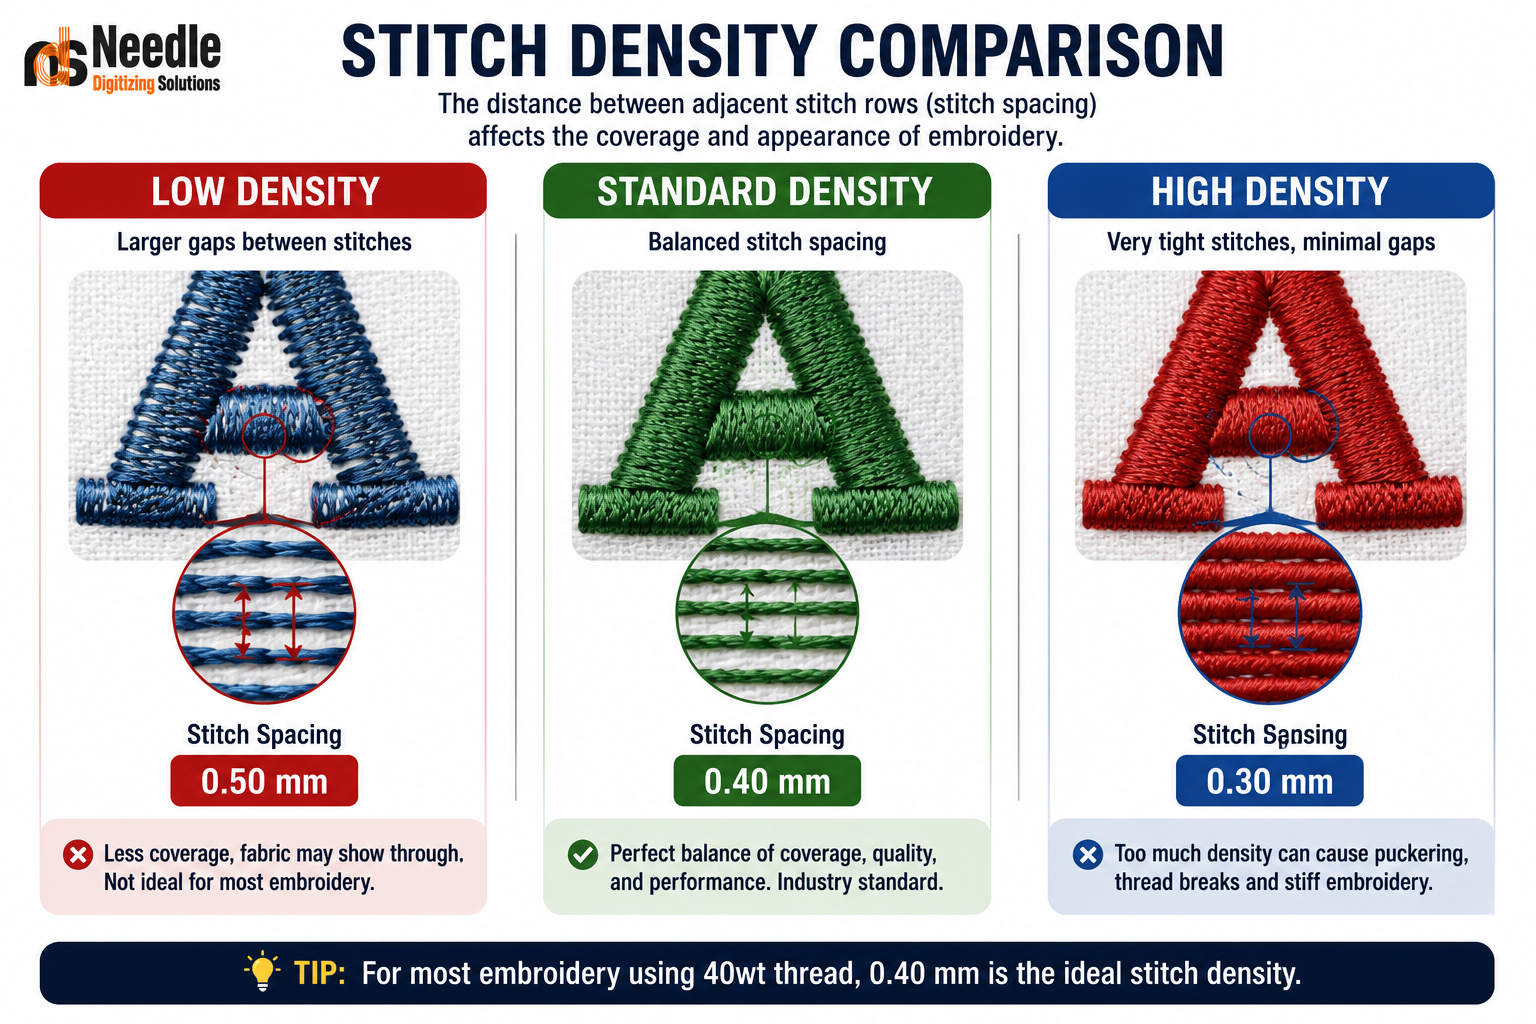
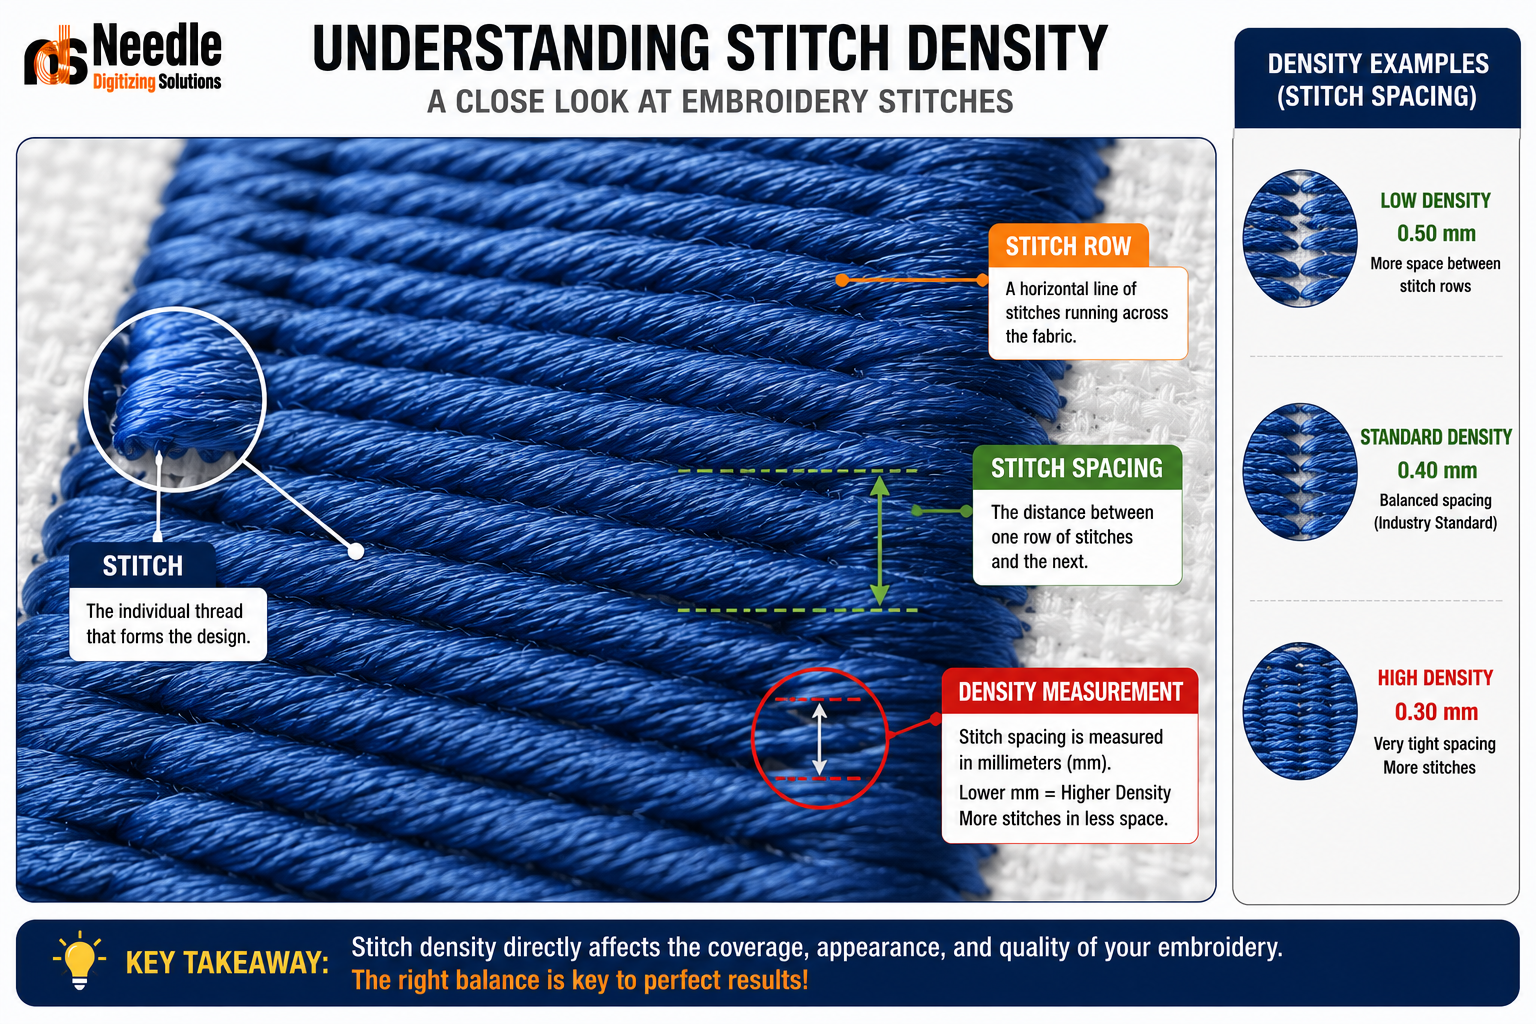
Stitch density refers to how closely embroidery stitches are placed together in a design.
Instead of measuring the number of stitches, density measures the distance between adjacent stitch rows.
For example:
Lower spacing = Higher density
Higher spacing = Lower density
Many professional embroidery software programs measure density in millimeters (mm).
For example:
Density Stitch Spacing
High Density 0.30mm
Medium Density 0.40mm
Light Density 0.50mm
The smaller the number, the more thread is packed into the design.
Is There One "Perfect" Stitch Density?
The simple answer is:
No.
The best stitch density depends on several factors, including:
Fabric type
Thread weight
Needle size
Design size
Stitch direction
Underlay stitches
Machine speed
Embroidery machine quality
Professional digitizers adjust density for every project rather than using one universal setting.
Standard Embroidery Stitch Density
For most commercial embroidery work in North America, these settings are commonly used.
Fabric Type Recommended Density
Cotton T-Shirts 0.40 mm
Polo Shirts 0.40–0.45 mm
Hoodies 0.42–0.45 mm
Denim 0.38–0.40 mm
Canvas Bags 0.38–0.42 mm
Baseball Caps 0.38–0.40 mm
Towels 0.45–0.50 mm
Fleece 0.45–0.50 mm
Softshell Jackets 0.42 mm
Performance Polyester 0.45–0.50 mm
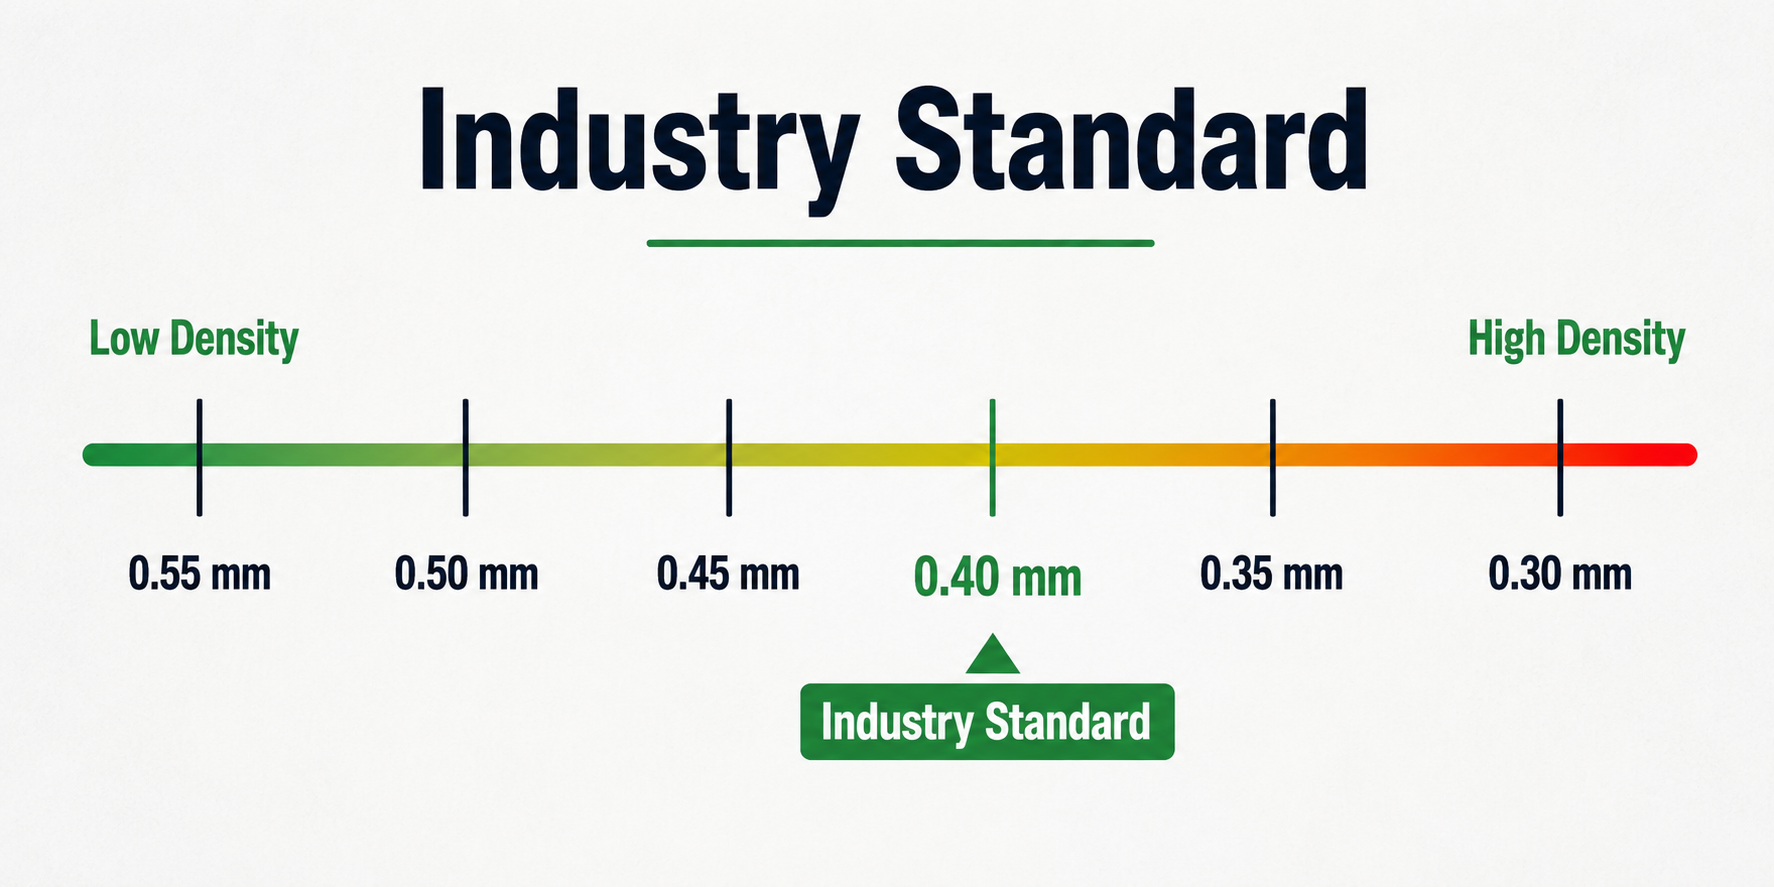
For most logo embroidery using 40 wt polyester thread, 0.40 mm remains the industry standard.
Why Stitch Density Matters
Proper stitch density affects nearly every aspect of embroidery quality.
1. Better Design Appearance
Correct density creates:
Smooth satin stitches
Sharp lettering
Clean fills
Balanced texture
Poor density often causes uneven stitching and distorted logos.
2. Reduced Thread Breaks
Excessively dense embroidery forces the needle through multiple layers of thread.
This can lead to:
Thread shredding
Needle heating
Frequent thread breaks
Machine downtime
Commercial embroidery shops often lose valuable production time due to incorrect density settings.
3. Prevents Fabric Puckering
Overly dense embroidery pulls fabric inward.
This causes:
Wrinkled garments
Distorted logos
Wavy borders
Customer complaints
Proper density combined with suitable underlay helps stabilize the fabric without excessive pull.
4. Improves Machine Performance
Balanced stitch density reduces stress on:
Needles
Rotary hooks
Tension system
Bobbin thread
This leads to smoother production and less machine maintenance.
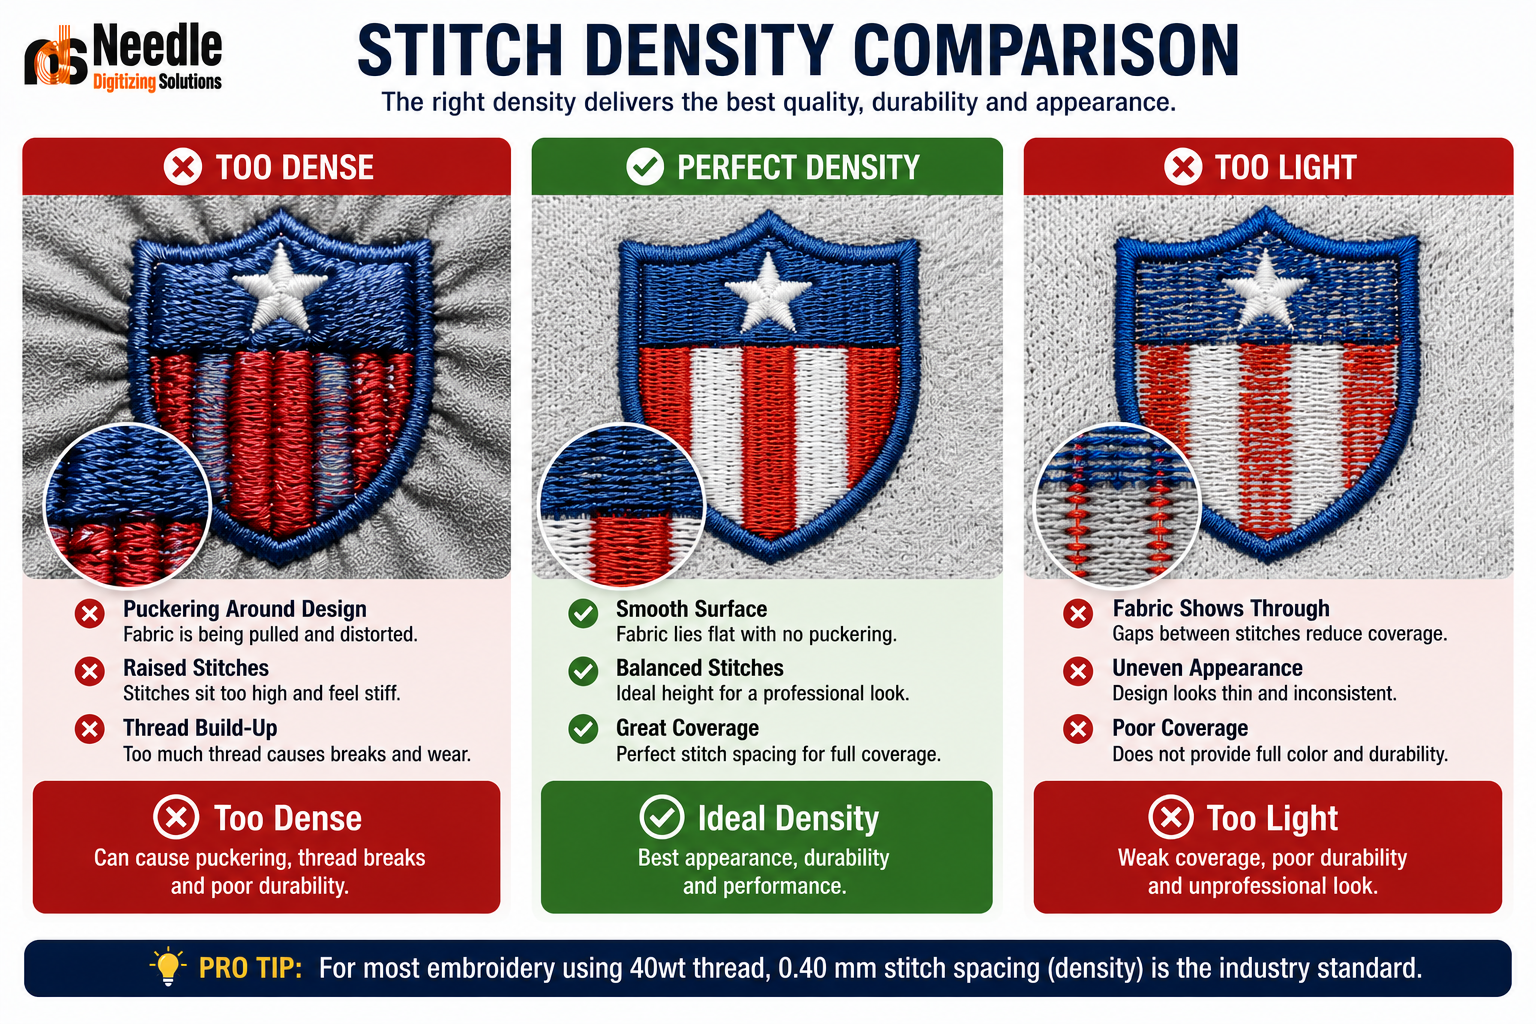
High Density vs Low Density
High Stitch Density
Typical range:
0.30–0.38 mm
Advantages:
Rich appearance
Excellent coverage
Vibrant colors
Premium look
Disadvantages:
More thread breaks
Increased production time
Higher thread consumption
Greater risk of puckering
Low Stitch Density
Typical range:
0.45–0.55 mm
Advantages:
Faster production
Less thread usage
Better for delicate fabrics
Reduced machine stress
Disadvantages:
Fabric may show through
Poor coverage
Less vibrant appearance
How Thread Weight Affects Density
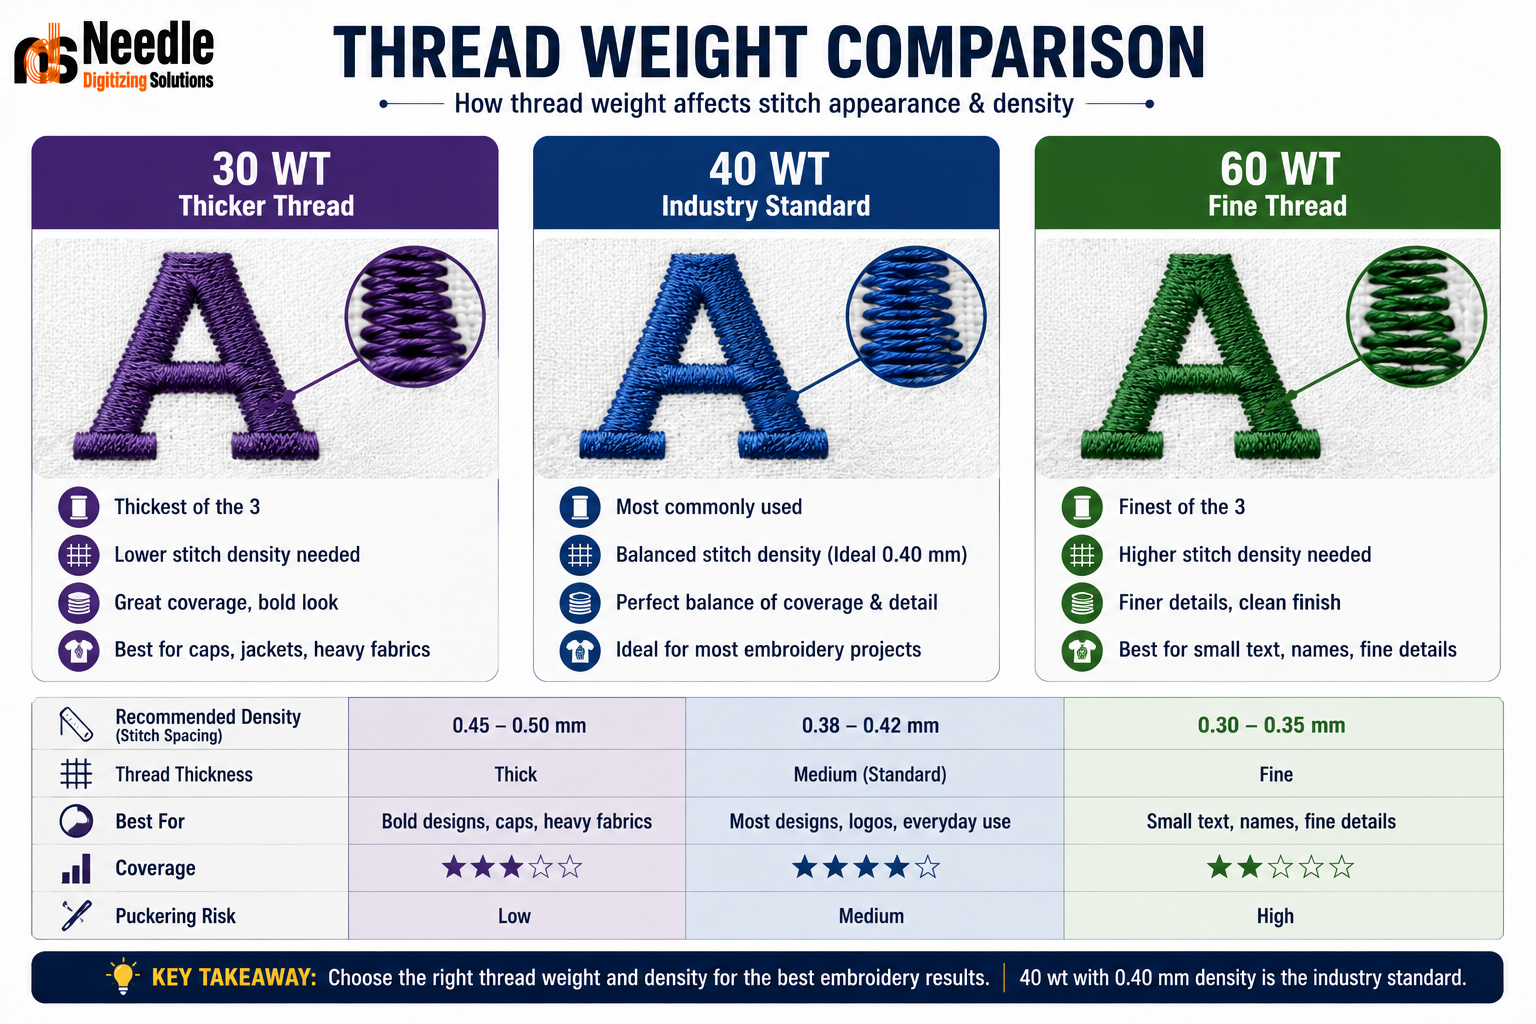
Different thread sizes require different density settings.
Thread Weight Suggested Density
30 wt 0.45–0.50 mm
40 wt 0.40 mm
60 wt 0.30–0.35 mm
Since 40 wt polyester thread is the industry standard in the USA and Canada, most commercial embroidery uses densities around 0.40 mm.
The Relationship Between Underlay and Density
Many beginners increase density when they actually need better underlay.
A proper underlay:
Supports top stitches
Prevents fabric show-through
Reduces pull distortion
Improves edge definition
Common underlay types include:
Edge run
Center walk
Zigzag
Tatami underlay
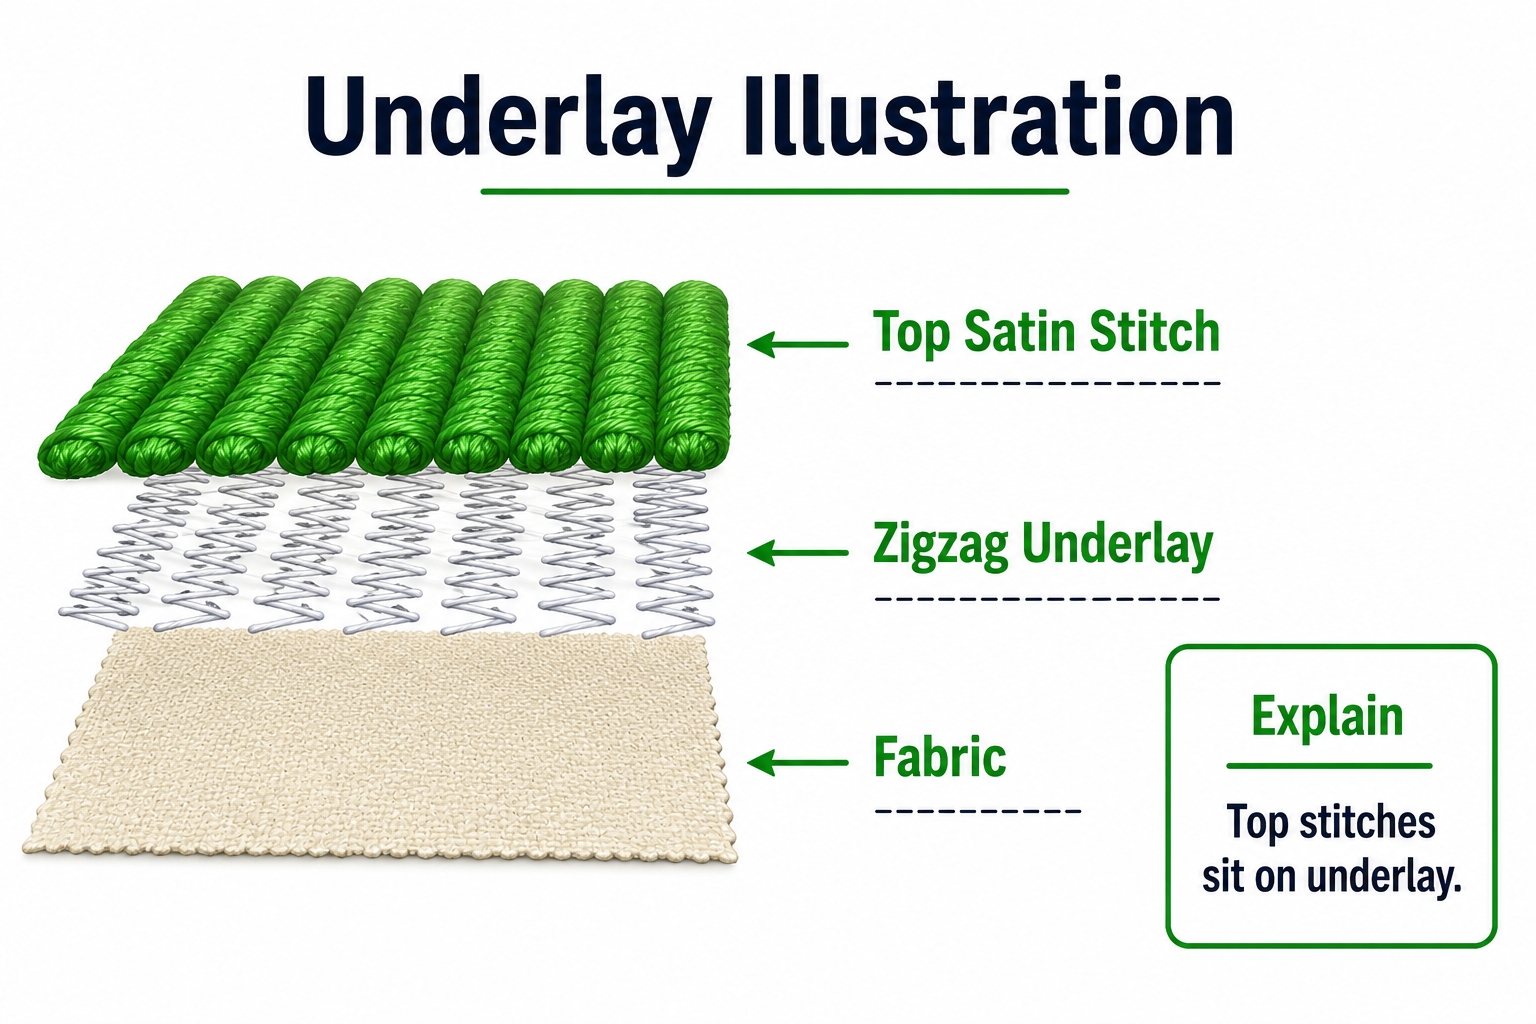
A well-digitized underlay often allows you to reduce top stitch density while maintaining excellent coverage.
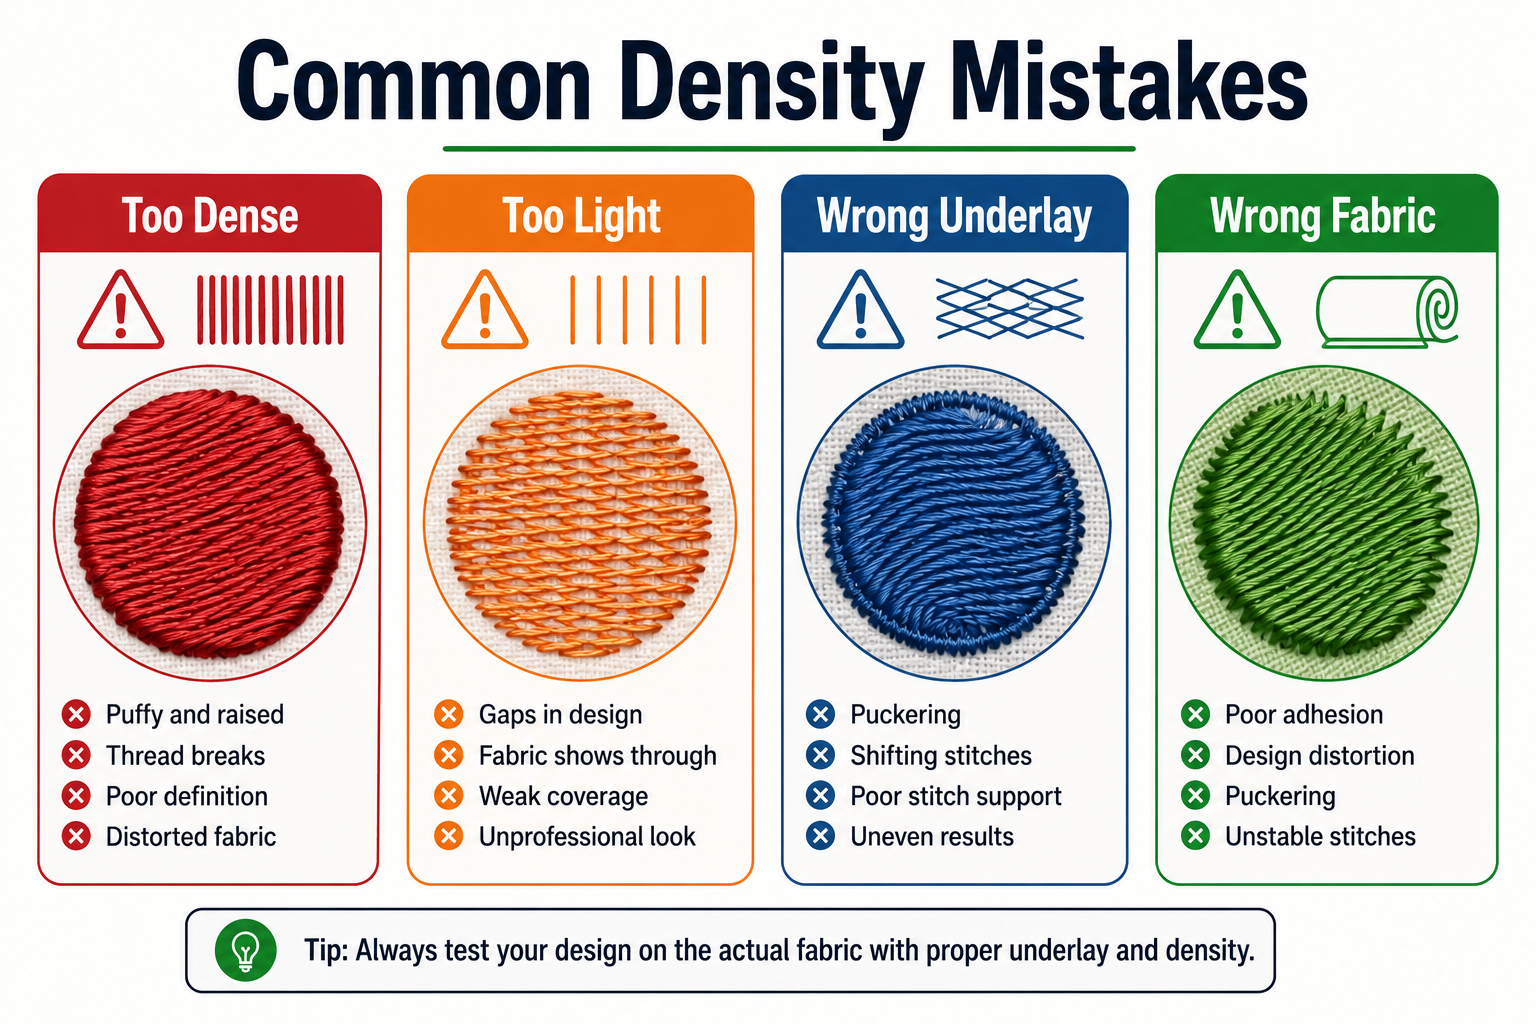
Common Stitch Density Mistakes
Using One Density for Every Fabric
Every material behaves differently.
A density that works on denim may ruin lightweight polyester.
Ignoring Push and Pull Compensation
Fabric movement changes stitch spacing during embroidery.
Professional digitizers always combine proper density with pull compensation.
Making Small Text Too Dense
Small lettering needs lighter density to prevent thread buildup.
Dense small text often becomes unreadable after stitching.
Increasing Density to Cover Fabric
Coverage should come from:
Proper underlay
Correct stitch angle
Quality digitizing
Not simply adding more stitches.
Signs Your Density Is Too High
Watch for these warning signs:
Frequent thread breaks
Needle breaks
Bird nesting
Design feels stiff
Fabric puckering
Raised embroidery
Machine vibration
Poor registration
Signs Your Density Is Too Low
Low density often results in:
Visible fabric underneath
Thin embroidery
Weak color coverage
Uneven fill areas
Gaps between stitches
Professional Digitizing Tips
Experienced embroidery digitizers follow several best practices:
Test every new design before production.
Match density to the fabric, not just the artwork.
Use quality cut-away or tear-away stabilizers based on the garment.
Adjust pull compensation along with density.
Keep satin stitches under about 12 mm wide; convert wider areas to fill stitches.
Reduce density slightly for lightweight or stretchy garments.
Increase underlay before increasing top stitch density.
Use sharp needles and high-quality thread for consistent results.
Recommended Density for Popular Commercial Products
Product Best Density Corporate Polo 0.42 mm
Hoodie Logo 0.42–0.45 mm
Left Chest Logo 0.40 mm
Baseball Cap Logo 0.38–0.40 mm
Jacket Back 0.42 mm
Backpack 0.40 mm
Canvas Tote 0.40 mm
Uniform Shirt 0.40 mm
Towel Monogram 0.48–0.50 mm
Frequently Asked Questions
What is the standard stitch density for machine embroidery?
For most commercial embroidery using 40 wt thread, 0.40 mm is considered the standard starting point. However, the final density should always be adjusted based on fabric type, design complexity, and desired coverage.
Does higher stitch density make embroidery better?
Not necessarily. While higher density can improve coverage, excessive density often leads to thread breaks, puckering, stiff embroidery, and unnecessary production costs.
Which fabrics require lower stitch density?
Stretchy performance fabrics, fleece, towels, and lightweight polyester generally benefit from lighter stitch densities between 0.45 mm and 0.50 mm.
Should cap embroidery use different density?
Yes. Structured caps usually support slightly tighter densities, typically around 0.38–0.40 mm, to maintain crisp detail and clean edges.
Final Thoughts
There is no universal "best" stitch density for every embroidery project. The ideal setting depends on the fabric, thread weight, stabilizer, design complexity, and machine setup. While 0.40 mm is an excellent starting point for many commercial embroidery jobs in the United States and Canada, professional results come from adjusting density to suit each specific application.
By combining appropriate stitch density with effective underlay, quality materials, and proper digitizing techniques, embroidery shops can produce designs that are durable, visually appealing, and efficient to manufacture. Mastering stitch density not only improves stitch quality but also reduces production issues, minimizes thread consumption, and enhances customer satisfaction—making it one of the most valuable skills for any embroidery professional.
Tags: