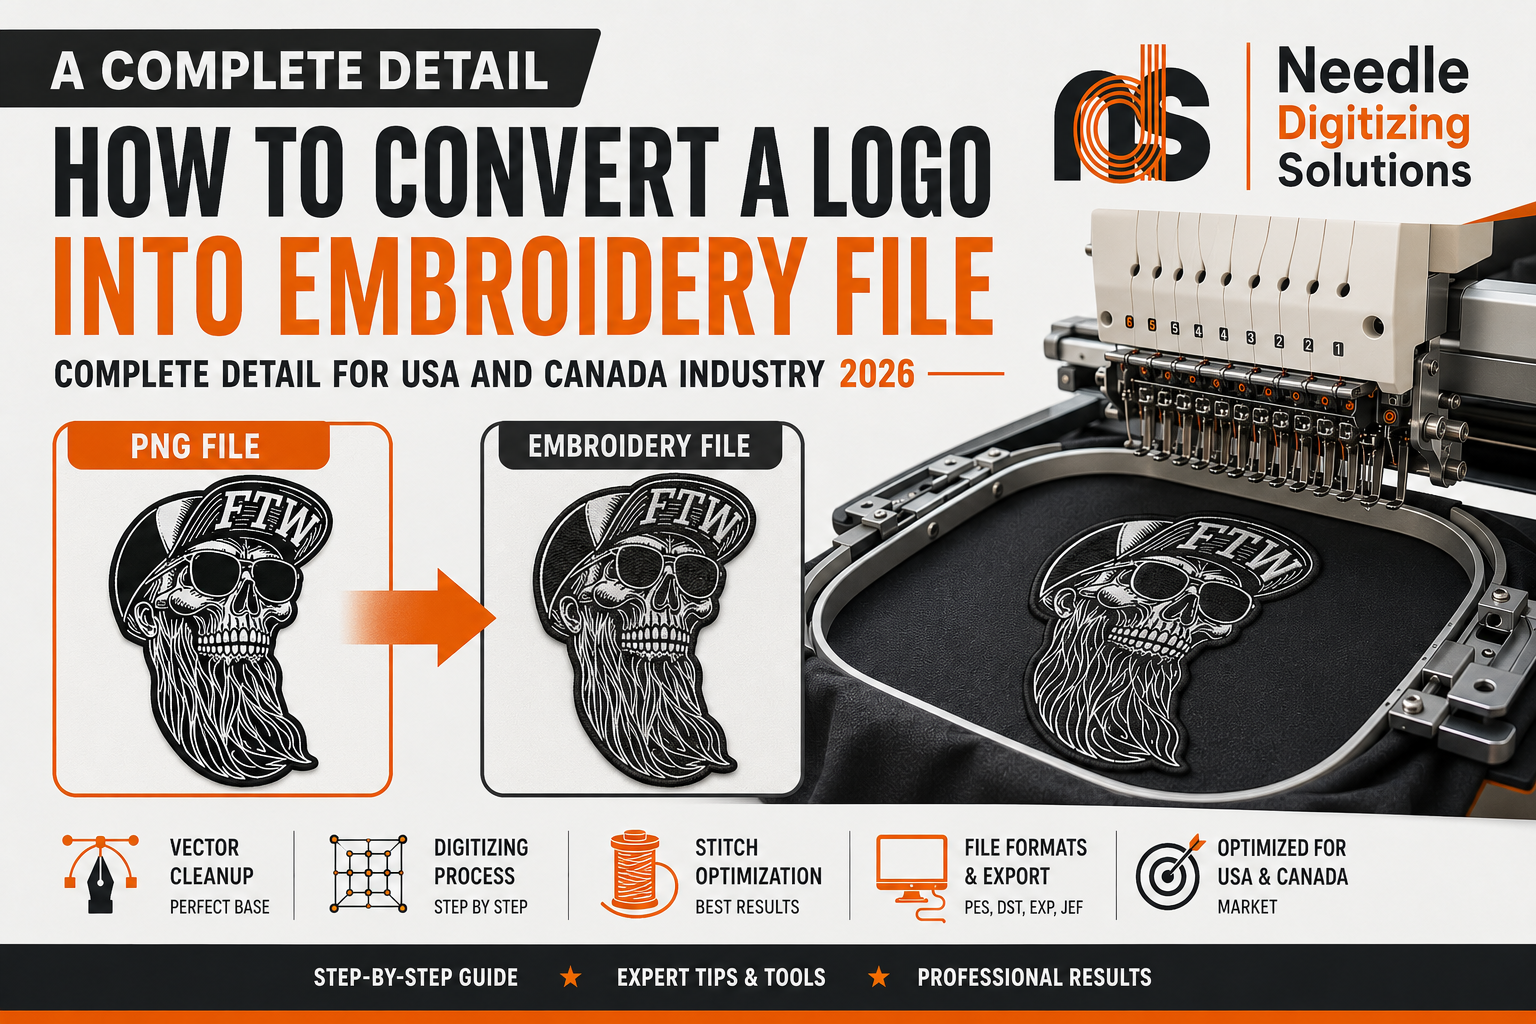
How to Convert a Logo into an Embroidery File (The Complete Professional Guide for USA & CANADA EMBROIDERY INDUSTRY 2026)
Learn how to convert a logo into an embroidery file with this complete step-by-step guide. Discover the embroidery digitizing process, file formats (DST, PES, JEF, EXP), stitch types, underlay, stitch density, and expert tips for creating high-quality, machine-ready embroidery designs for commercial embroidery on caps, polos, jackets, and uniforms. Perfect for embroidery businesses in the USA and Canada..
Introduction
Many people believe they can simply upload a JPG or PNG logo into an embroidery machine and begin stitching. Unfortunately, embroidery machines cannot read image files. Instead, they require specialized embroidery files that contain stitch instructions, thread colors, stitch directions, underlay settings, densities, and machine commands.
Converting a logo into an embroidery file is a technical process known as embroidery digitizing. It combines design knowledge with embroidery engineering to produce a file that stitches smoothly on fabric while maintaining the appearance of the original artwork.
Whether you own an embroidery shop, an apparel brand, or you're creating custom uniforms, understanding the digitizing process will help you achieve cleaner embroidery and avoid costly production errors.
What Is an Embroidery File?
An embroidery file is very different from an ordinary graphic file.
A PNG or JPG stores colored pixels. An embroidery file stores instructions for the embroidery machine.
These instructions include:
Stitch type
Stitch angle
Stitch sequence
Thread color changes
Stitch density
Underlay
Pull compensation
Trim commands
Needle stops
Without these instructions, an embroidery machine has no way to recreate the design accurately.
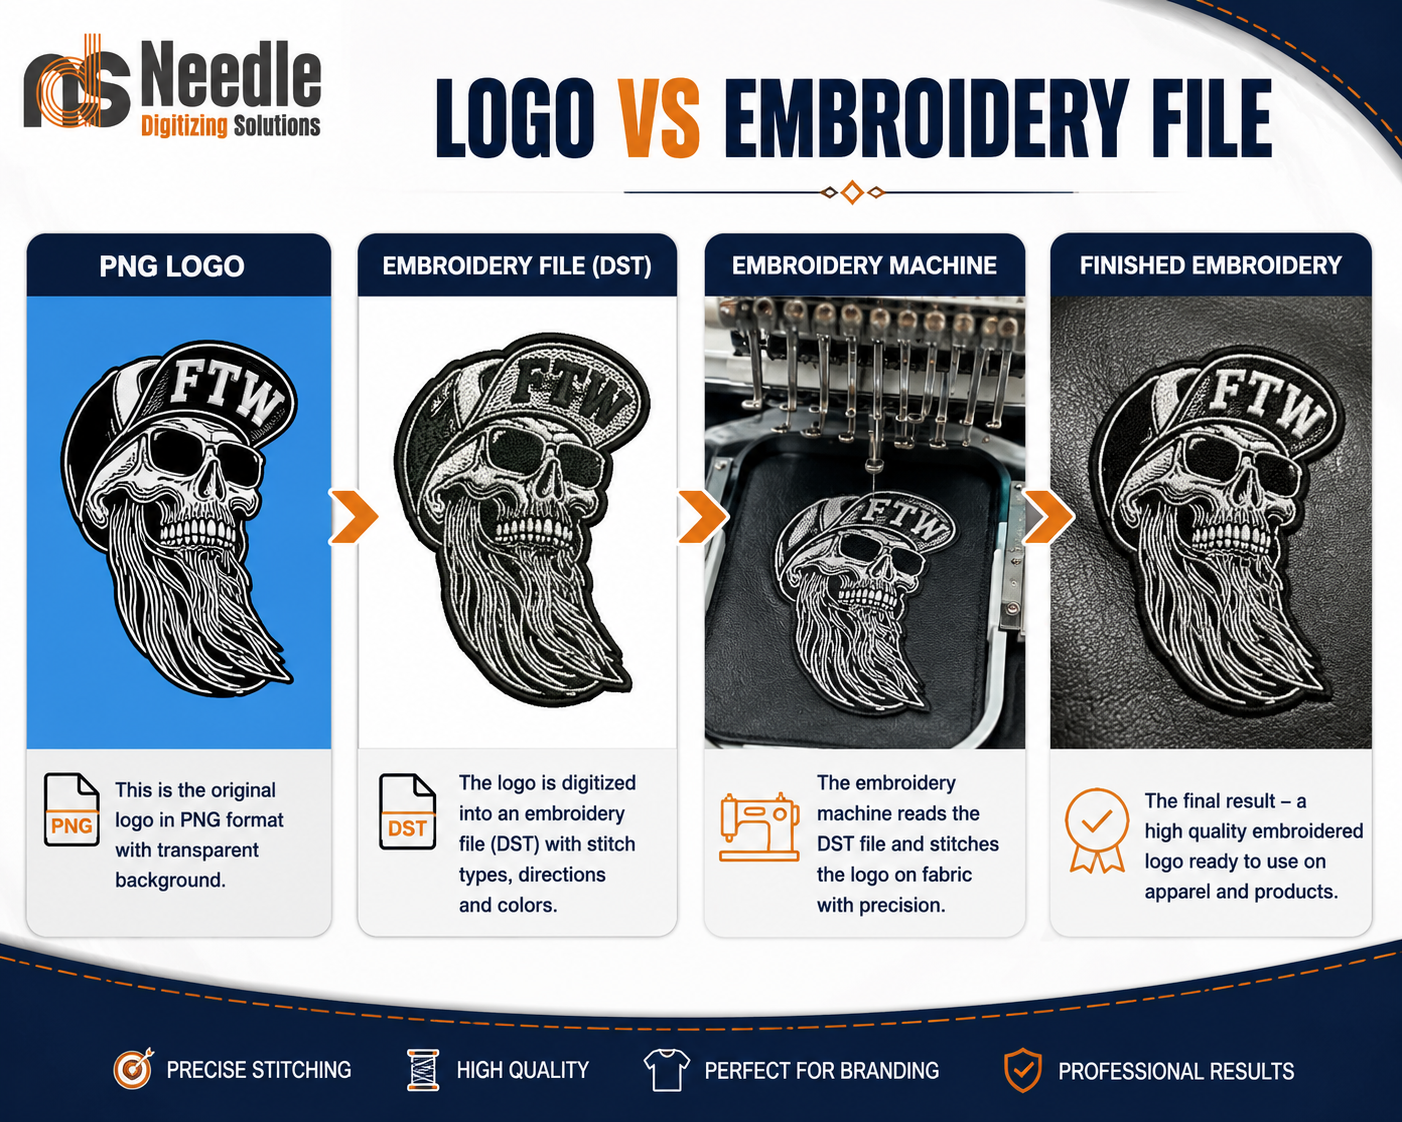
Picture: 1- Logo vs embroidery file.
Why Images Cannot Be Stitched Directly
This is one of the most common questions beginners ask.
A normal image contains millions of colored pixels.
An embroidery machine needs mathematical stitch paths instead.
For example:
A circle in Photoshop is simply colored pixels.
A circle in embroidery consists of:
Satin borders
Fill stitches
Underlay
Stitch direction
Density
Compensation
That is why embroidery digitizing software is required.
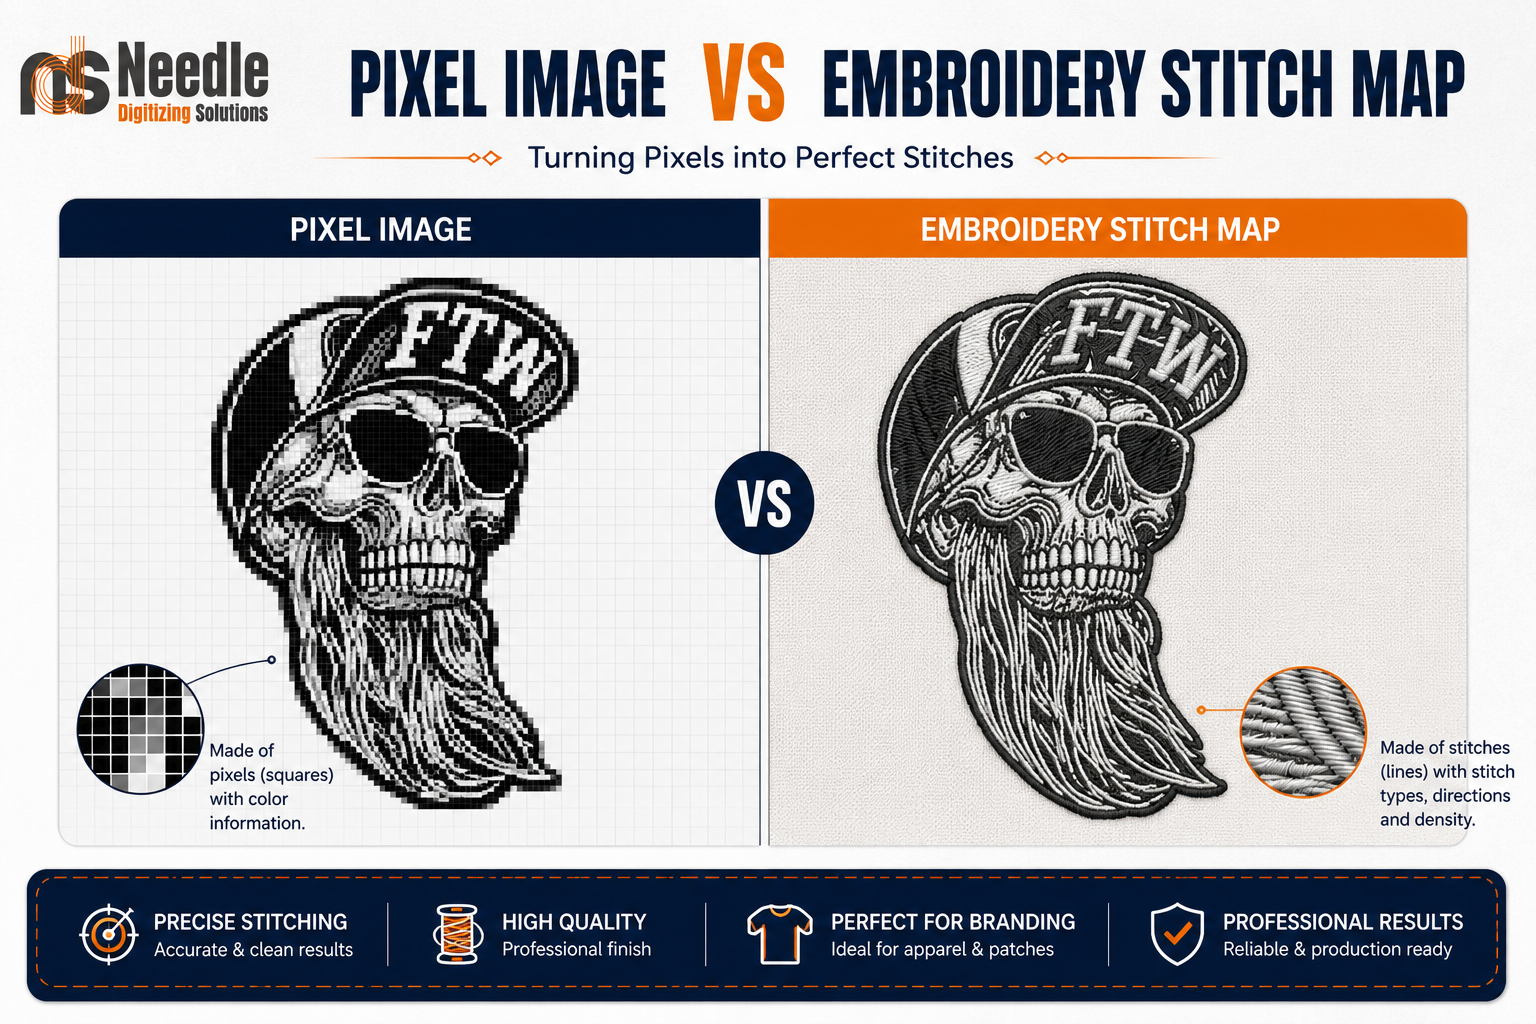
Picture:2- pixel image VS embroidery stitch map.
Understanding Embroidery Digitizing
Explain that digitizing is not automatic file conversion.
Professional digitizers make decisions such as:
Which stitch type should be used?
What stitch angle works best?
Where should trims occur?
Which sections should sew first?
How much pull compensation is needed?
Which underlay stabilizes the fabric?
How dense should the stitches be?
These decisions determine whether the embroidery will sew cleanly or fail during production.
Step 1: Evaluate the Logo
Before digitizing begins, analyze the artwork.
Questions to consider:
Is the logo too detailed?
Are there very small letters?
Are gradients present?
Are shadows included?
Is the artwork vector?
Will the logo fit the garment?
Professional digitizers often simplify artwork before stitching.
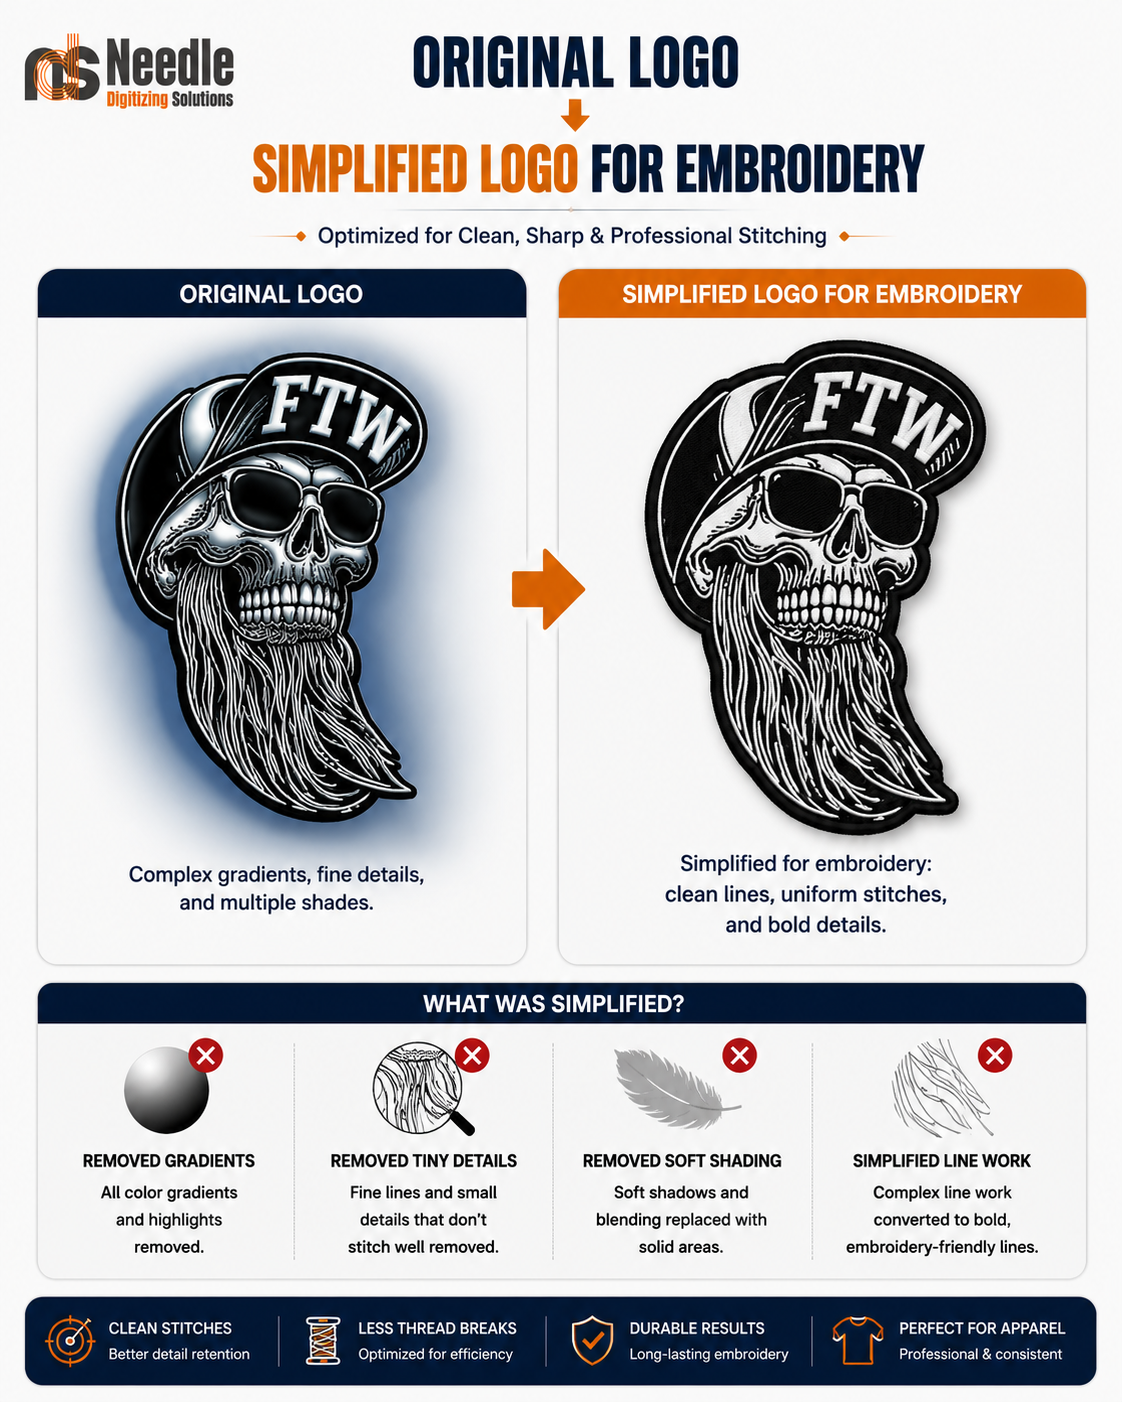
Picture:3- Original logo to simplified logo for embroidery.
Step 2: Choose the Right Stitch Types
Explain each stitch in detail.
Running Stitch
Used for:
Outlines
Fine details
Decorative lines
Advantages:
Low stitch count
Fast sewing
Clean appearance
Satin Stitch
Used for:
Letters
Borders
Small shapes
Advantages:
Smooth finish
Professional shine
Excellent for logos
Fill Stitch
Used for:
Large areas
Backgrounds
Solid embroidery
Advantages:
Strong coverage
Durable
Attractive texture
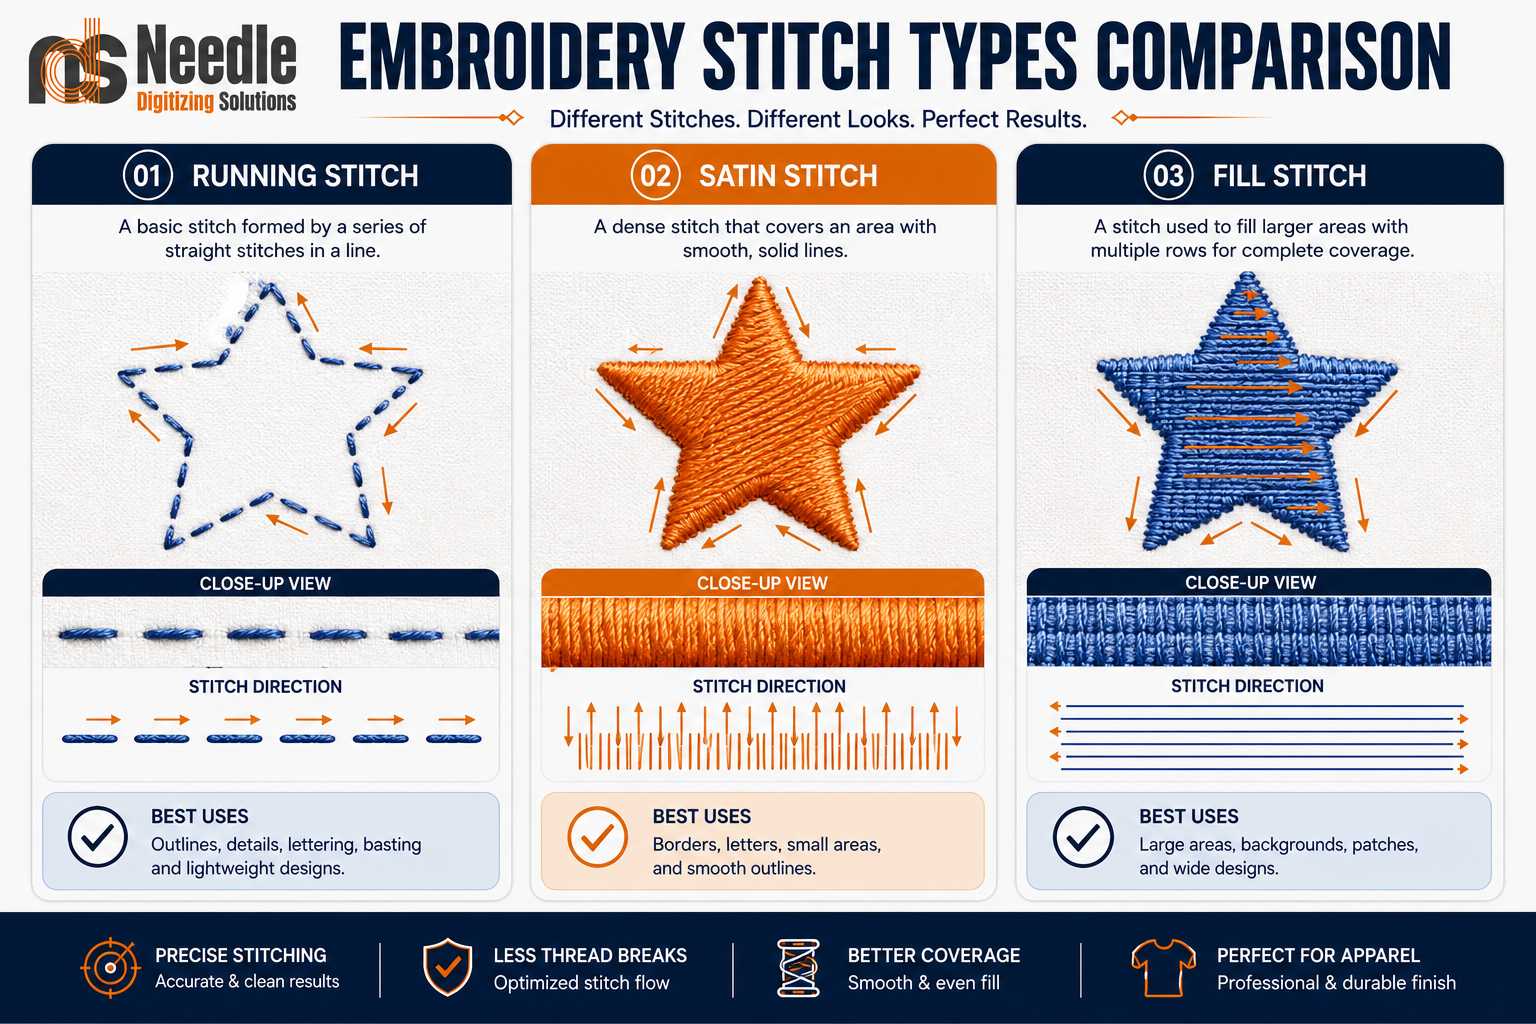
Picture:4- Embroidery stitch types comparison.
Step 3: Plan the Stitch Sequence
After selecting the correct stitch types, the next step is to plan the stitch sequence. This is one of the most critical parts of professional embroidery digitizing because it determines how the embroidery machine will build the design from start to finish.
A stitch sequence is the order in which different parts of the design are embroidered. While it may seem like the machine can stitch any area at any time, the wrong sequence can cause fabric distortion, gaps, poor registration, thread breaks, and an unprofessional finish.
Professional digitizers carefully organize the sewing order to ensure that every section is stitched efficiently and with minimal movement of the fabric.
Why Stitch Sequence Matters
During embroidery, thousands of stitches pull and push the fabric in different directions. If the sequence is not planned correctly, the fabric can shift before the design is complete, causing outlines to miss their fill areas or letters to become distorted.
A well-planned stitch sequence offers several benefits:
Reduces fabric movement during stitching
Improves registration between design elements
Minimizes thread trims and color changes
Reduces thread breaks
Produces cleaner edges and smoother embroidery
Shortens machine production time
For commercial embroidery businesses, an optimized stitch sequence improves both quality and efficiency.
A Typical Stitch Sequence
Although every logo is different, most professional embroidery designs follow a logical sewing order:
1. Start with Underlay
The machine begins by sewing the underlay stitches. These hidden stitches stabilize the fabric and provide a strong foundation for the visible embroidery.
2. Stitch Large Fill Areas
Large background fills are sewn first because they stabilize the design and reduce distortion before smaller details are added.
3. Add Medium-Sized Objects
Once the large areas are complete, medium-sized shapes, symbols, and decorative elements are embroidered.
4. Stitch Small Details
Fine details such as eyes, small symbols, or decorative lines are sewn after the main structure is complete.
5. Embroider Lettering
Text is usually stitched near the end to maintain sharp edges and improve readability.
6. Finish with Satin Borders
The final step is sewing satin borders or outline stitches. This creates crisp, clean edges and hides any minor gaps between fill stitches and outlines.
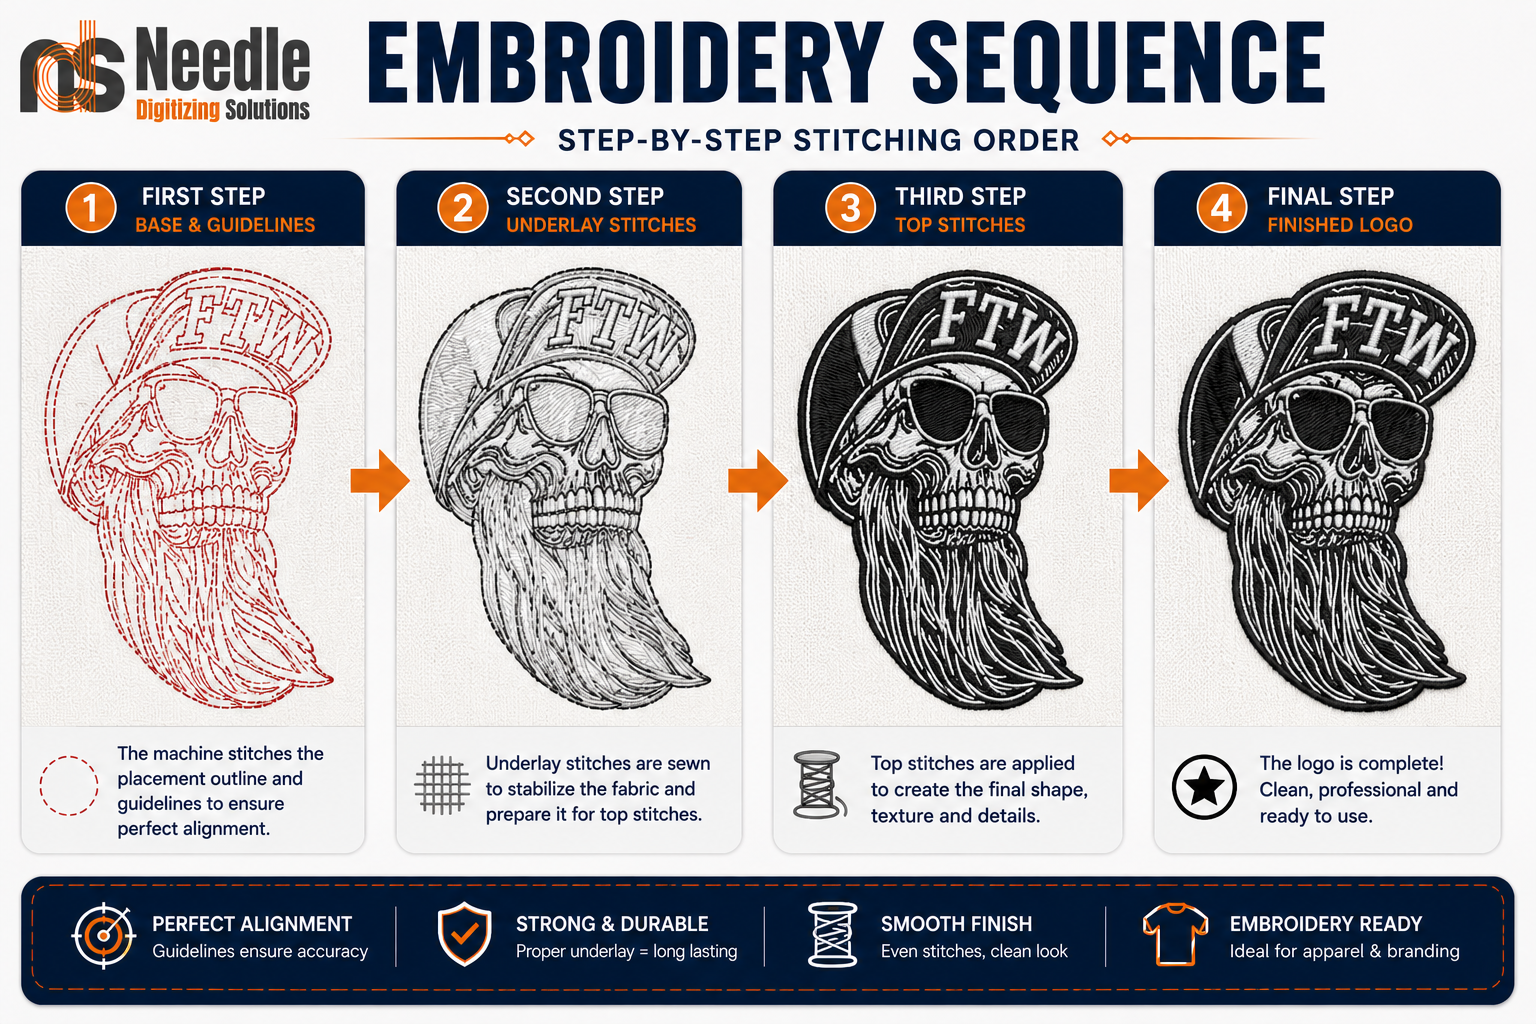
Picture:5- Embroidery sequence.
Step 4: Select the Right Underlay
Once the stitch sequence has been planned, the next step is to choose the correct underlay. Underlay is often called the foundation of embroidery because it provides the support needed for the top stitches to sit smoothly on the fabric.
Although underlay is hidden beneath the finished embroidery, it has a major impact on the quality, durability, and appearance of the final design. Many embroidery problems—such as puckering, poor stitch coverage, uneven lettering, and fabric distortion—are caused by incorrect or insufficient underlay.
Professional digitizers never skip this step. Instead, they carefully select the right underlay type based on the fabric, design size, stitch type, and the final use of the embroidered product.
What Is Underlay?
Underlay is a layer of stitches sewn before the visible embroidery. These stitches are placed directly onto the fabric and are later covered by the top stitches.
Unlike decorative stitches, underlay is designed to:
Stabilize the fabric
Anchor the embroidery design
Prevent fabric shifting
Support top stitches
Improve stitch coverage
Reduce puckering
Increase embroidery durability
Think of underlay like the foundation of a building. A strong foundation ensures the structure remains stable and long-lasting.
Why Is Underlay Important?
During embroidery, thousands of stitches pull on the fabric from different directions. Without underlay, the fabric can stretch, wrinkle, or shift, leading to poor-quality embroidery.
Proper underlay provides several benefits:
Keeps the fabric flat during stitching
Supports satin and fill stitches
Improves edge definition
Prevents gaps between stitches
Reduces thread sink on soft fabrics
Produces smoother, cleaner embroidery
Improves the durability of the design after repeated washing
Whether you are embroidering a cap, polo shirt, hoEodie, towel, or jacket, selecting the correct underlay is essential for professional results.
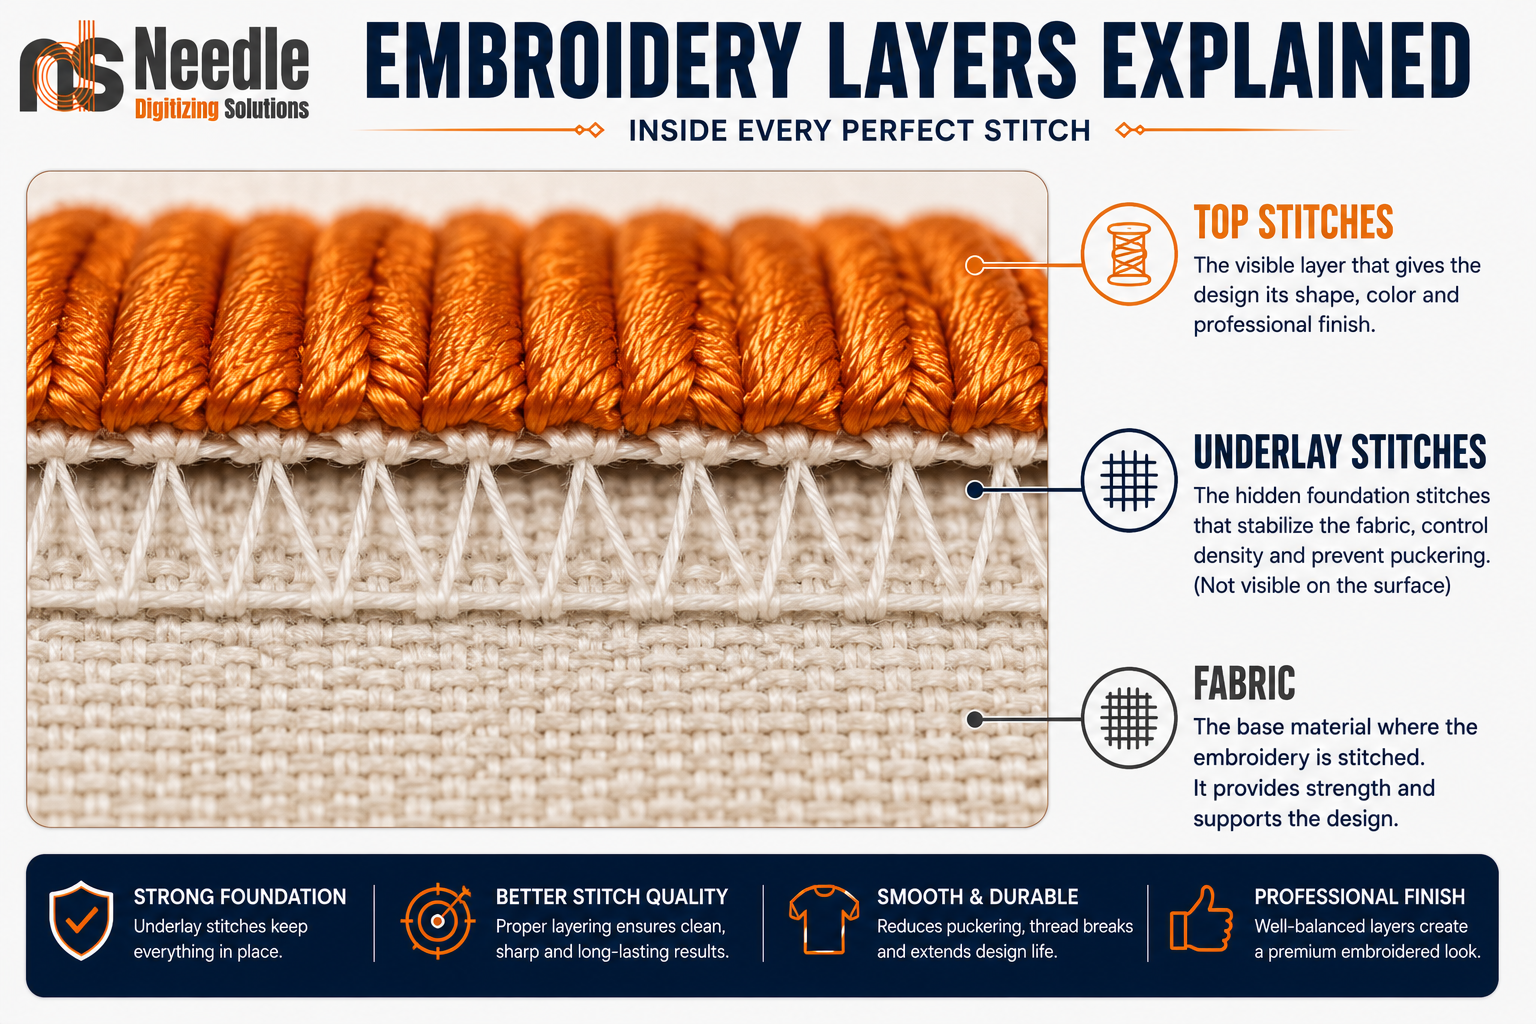
Pictre:6- Embroidery layers explained.
Types of Underlay
Different embroidery designs require different types of underlay. Professional digitizing software offers several options, each designed for specific stitch types and fabrics.
1. Edge Run Underlay
Edge Run underlay consists of a single line of stitches placed just inside the edge of satin columns.
Best For
Satin stitch lettering
Small logos
Narrow borders
Benefits
Creates sharp edges
Improves stitch registration
Supports satin stitches
Produces clean lettering
2. Center Walk Underlay
Center Walk is a row of running stitches placed through the center of satin columns.
Best For
Medium-width satin stitches
Company logos
Uniform embroidery
Benefits
Stabilizes long satin stitches
Prevents stitch shifting
Improves durability
3. Zigzag Underlay
Zigzag underlay creates wider support beneath satin stitches.
Best For
Large satin columns
Jacket logos
Cap embroidery
Benefits
Adds extra support
Increases stitch coverage
Prevents thread sinking
Creates raised embroidery
4. Tatami (Fill) Underlay
Tatami underlay consists of rows of running stitches placed beneath fill stitches.
Best For
Large filled areas
Background embroidery
Badge designs
Jacket backs
Benefits
Supports dense fill stitching
Reduces fabric distortion
Improves coverage
Creates a smoother finish
How to Choose the Right Underlay
The correct underlay depends on several factors.
Fabric Type
Different fabrics behave differently during embroidery.
Cotton
Requires moderate underlay because the fabric is stable.
Polyester
Needs additional stabilization to reduce stretching.
Fleece
Requires heavier underlay because stitches tend to sink into the soft fabric.
Towels
Need strong underlay to lift stitches above the towel loops.
Caps
Require firm underlay to support structured front panels.
Common Underlay Mistakes
Even experienced beginners sometimes make these mistakes:
No Underlay
Results in poor stitch coverage, uneven embroidery, and puckering.
Too Much Underlay
Creates excessive bulk, stiff embroidery, and unnecessary stitch count.
Wrong Underlay Type
Using fill underlay beneath satin lettering can reduce edge sharpness and make text appear less defined.
Incorrect Stitch Direction
If the underlay runs in the same direction as the top stitches, it may not provide enough support.
Professional Tips
Professional digitizers follow these best practices:
Match the underlay to the fabric type.
Use lighter underlay for stable woven fabrics.
Increase underlay for soft or stretchy materials.
Combine underlay types for complex logos when necessary.
Test stitch-outs before production.
Avoid adding unnecessary stitches that increase production time.
Step 5: Set the Correct Stitch Density
Selecting the correct stitch density is one of the most important steps in embroidery digitizing. Even a perfectly designed logo can produce poor embroidery if the stitch density is not properly adjusted. Professional digitizers spend considerable time fine-tuning density because it directly affects the appearance, durability, and sewability of the final design.
Stitch density refers to the spacing between embroidery stitches, not simply the number of stitches in a design. A lower spacing value creates more stitches packed into the same area, while a higher spacing value creates fewer stitches and a lighter fill.
Finding the right balance is essential. Too many stitches can damage the fabric and create production problems, while too few stitches can leave gaps that expose the material underneath.
Every professional embroidery design begins with selecting the correct stitch density based on the fabric, thread, design size, and intended application.
What Is Stitch Density?
Stitch density is the distance between two adjacent rows of embroidery stitches. It is usually measured in millimeters (mm) in professional embroidery software such as Wilcom, Hatch, and Pulse.
For example:
0.30 mm = High Density (more stitches)
0.40 mm = Standard Density
0.50 mm = Low Density (fewer stitches)
Many beginners assume that increasing the stitch count automatically improves quality. In reality, excessive density often causes more problems than it solves.
The goal of professional digitizing is to use only as many stitches as necessary to achieve full coverage while maintaining smooth machine performance.
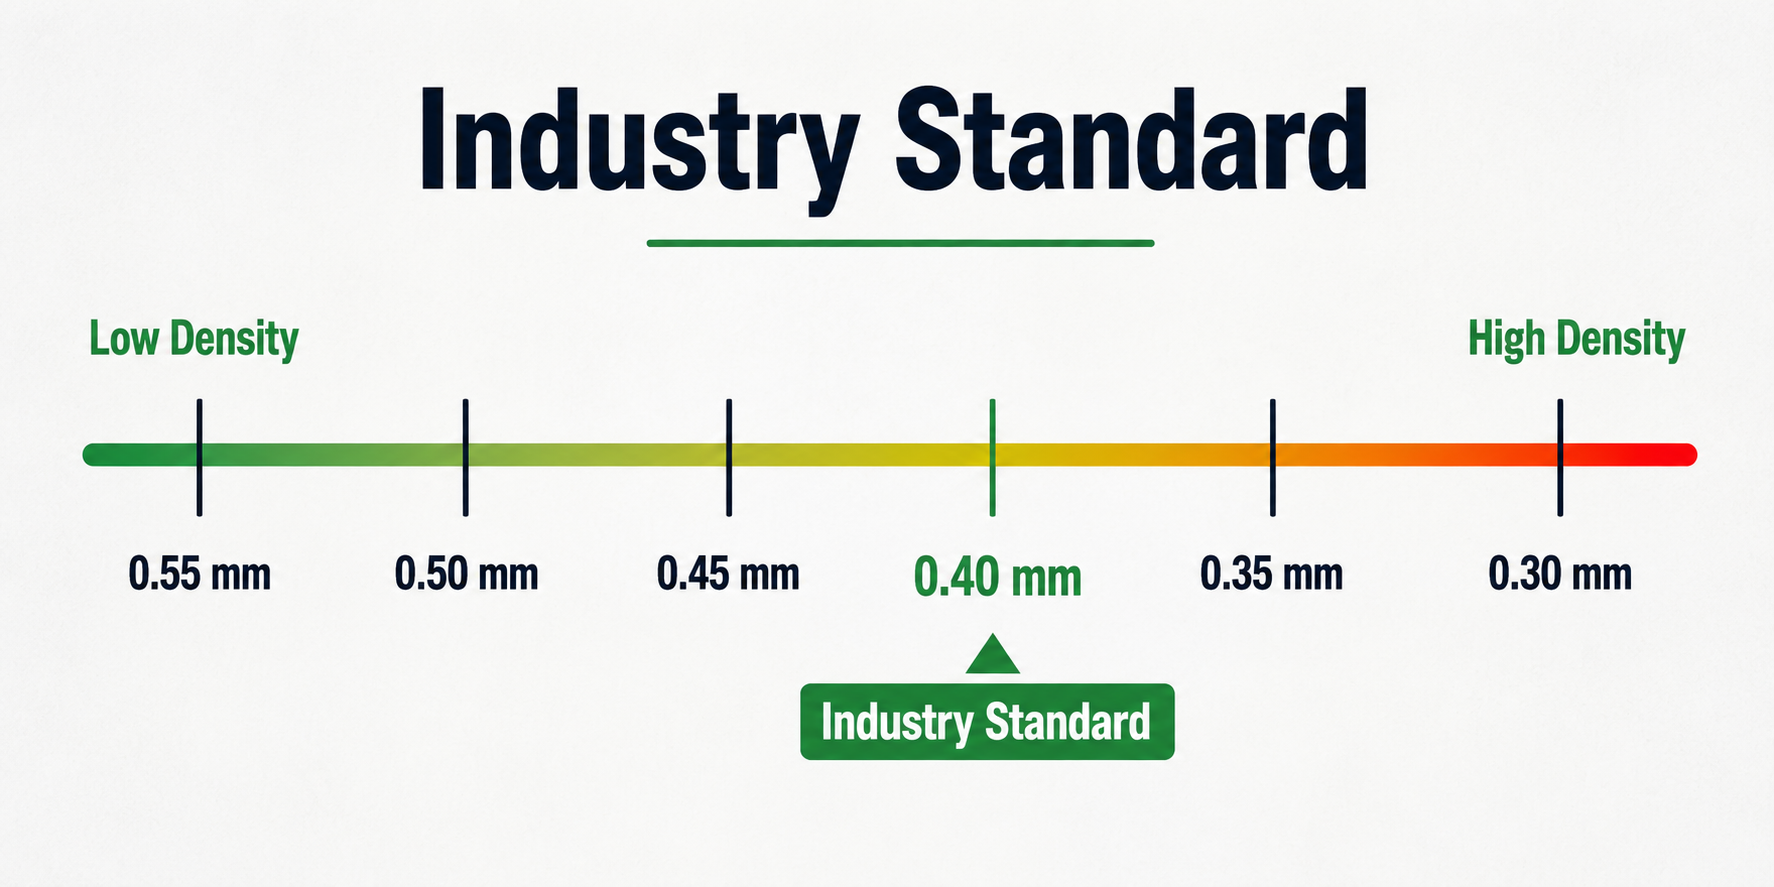
Picture:7-Industry Standard for stitch density.
Why Stitch Density Matters
Every stitch placed by an embroidery machine pulls on the fabric. If the design contains too many stitches in a small area, the fabric can become distorted and the machine may struggle to complete the design.
Correct stitch density provides several important benefits:
Produces smooth and even embroidery
Improves thread coverage
Reduces puckering
Prevents thread breaks
Minimizes needle breaks
Reduces machine stress
Creates softer embroidery
Improves durability after washing
Commercial embroidery shops pay close attention to stitch density because it affects production speed, quality, and customer satisfaction.
Understanding High, Medium, and Low Density
High Stitch Density
High-density embroidery places many stitches close together. While this creates a bold appearance, it also increases the risk of production problems.
Advantages
Excellent thread coverage
Rich and bold appearance
Suitable for small satin columns
Disadvantages
Thread breaks
Needle breaks
Fabric puckering
Heavy embroidery
Increased machine wear
Longer production time
High density should only be used when necessary, such as on narrow satin lettering or designs requiring maximum coverage.
Standard Stitch Density
Standard density provides the best balance between appearance and performance.
It offers:
Excellent coverage
Smooth stitching
Reduced machine stress
Professional appearance
Efficient production
Most commercial embroidery logos are digitized using a standard density of approximately 0.40 mm, although this varies depending on the design and fabric.
Low Stitch Density
Low-density embroidery spaces stitches farther apart.
Advantages
Softer embroidery
Faster production
Reduced thread consumption
Less fabric distortion
Disadvantages
Fabric may show through
Gaps between stitches
Poor coverage on dark fabrics
Reduced visual impact
Low density works well for towels, fleece, and other thick fabrics where heavy stitching is unnecessary.
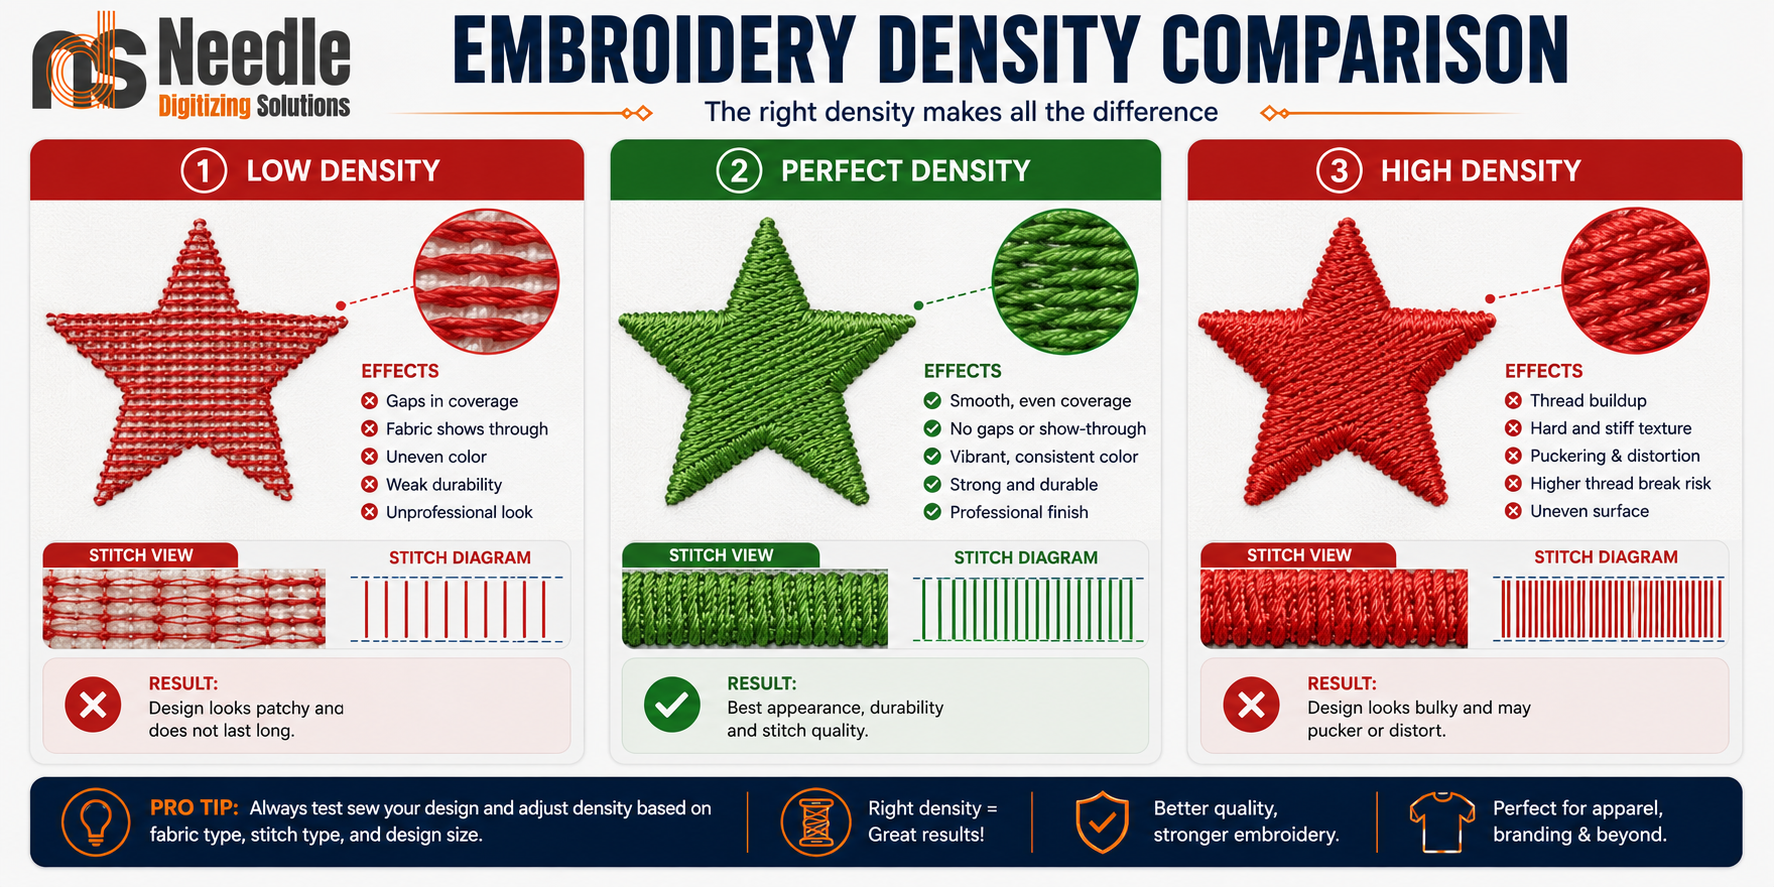
Picture:8- Embroidery density comparison.
Factors That Affect Stitch Density
Professional digitizers never use the same density for every design. Instead, they adjust it based on several factors.
1. Fabric Type
Different fabrics react differently to embroidery.
Cotton
Cotton is stable and works well with standard stitch density.
Recommended: 0.40 mm
Polyester
Polyester stretches more than cotton and often benefits from a slightly lighter density combined with proper underlay.
Recommended: 0.42–0.45 mm
Denim
Denim is firm and can support higher stitch density without distortion.
Recommended: 0.38–0.40 mm
Fleece
Because stitches sink into the fabric, fleece requires lighter density and stronger underlay.
Recommended: 0.45–0.48 mm
Towels
Towels have thick loops that require increased spacing and a heavy underlay to achieve clean coverage.
Recommended: 0.48–0.50 mm
Caps
Cap embroidery often uses slightly higher density because of the structured front panel.
Recommended: 0.38–0.40 mm
Thread Weight and Stitch Density
Thread thickness also influences density settings.
30 wt Thread
A thicker thread covers more surface area.
Recommended density:
0.45–0.50 mm
40 wt Thread
This is the industry standard for commercial embroidery.
Recommended density:
0.40 mm
60 wt Thread
Used for fine lettering and small details.
Recommended density:
0.30–0.35 mm
Choosing the correct combination of thread weight and stitch density results in cleaner embroidery and better production efficiency.
Common Stitch Density Problems
Density Too High
When stitches are packed too closely together, several problems may occur:
Fabric puckering
Thread breaks
Needle breaks
Bird nesting
Heavy, stiff embroidery
Loss of detail
Longer machine runtime
Density Too Low
When there are not enough stitches:
Fabric shows through
Visible gaps
Uneven coverage
Weak embroidery
Poor appearance on dark garments
How Professional Digitizers Determine Stitch Density
Experienced digitizers rarely rely on default software settings. Instead, they evaluate:
Fabric thickness
Fabric stability
Logo size
Stitch type
Thread weight
Needle size
Underlay type
Garment application
After digitizing, they produce a test stitch-out on the same material that will be used in production. If necessary, they adjust the density until the embroidery is balanced, smooth, and free of defects.
Step 6: Apply Pull Compensation
After selecting the correct stitch density and underlay, the next crucial step in embroidery digitizing is applying pull compensation. This is one of the techniques that separates professional embroidery files from automatically generated designs.
When an embroidery machine stitches a design, every stitch pulls the fabric slightly toward the center of the stitch line. As thousands of stitches are sewn, this pulling effect becomes more noticeable. Without proper compensation, circles may become oval, borders may not align with fill stitches, and small letters may appear thinner than intended.
Pull compensation is the process of slightly increasing the width of embroidery objects during digitizing to compensate for the natural pull of the thread and fabric during stitching. Although these adjustments are usually very small—often only a fraction of a millimeter—they make a significant difference in the final embroidered result.
Why Is Pull Compensation Important?
Every fabric reacts differently during embroidery. As stitches tighten, the fabric compresses and the embroidered shapes become slightly smaller than the original design. If this movement is not considered during digitizing, the finished embroidery may look distorted.
Applying the correct pull compensation helps to:
Maintain the original shape of the logo
Keep satin columns at the correct width
Improve the readability of small lettering
Ensure borders align perfectly with fill stitches
Reduce visible gaps between embroidery sections
Produce cleaner, more professional embroidery
Professional digitizers always adjust pull compensation based on the design, fabric type, stitch direction, and stitch density.
How Pull Compensation Works
Imagine digitizing a satin border that is 4.0 mm wide. During stitching, the tension of the thread naturally pulls the stitches inward, and the finished border may measure only 3.7 mm.
To prevent this, the digitizer increases the width slightly—perhaps to 4.3 mm. Once the embroidery is stitched, the natural pull reduces the width back to approximately 4.0 mm, matching the intended design.
This small adjustment ensures that the finished embroidery closely matches the original artwork.
Factors That Affect Pull Compensation
The amount of pull compensation varies depending on several factors:
Fabric Type
Stretchy fabrics such as polyester, fleece, and performance wear usually require more compensation than stable woven fabrics like denim or twill.
Stitch Type
Wide satin stitches generally need more pull compensation than running stitches or fill stitches because they experience greater thread tension.
Stitch Density
High-density embroidery creates stronger pulling forces, so additional compensation may be required to maintain the correct shape.
Design Size
Very small text and fine details are more sensitive to fabric movement and often require precise compensation to remain clear and readable.
Common Problems Without Pull Compensation
If pull compensation is ignored, several embroidery defects can occur:
Thin or uneven lettering
Gaps between borders and fill stitches
Distorted circles and curved shapes
Narrow satin columns
Misaligned outlines
Poor registration between design elements
These issues are especially noticeable on logos with fine details or small text.
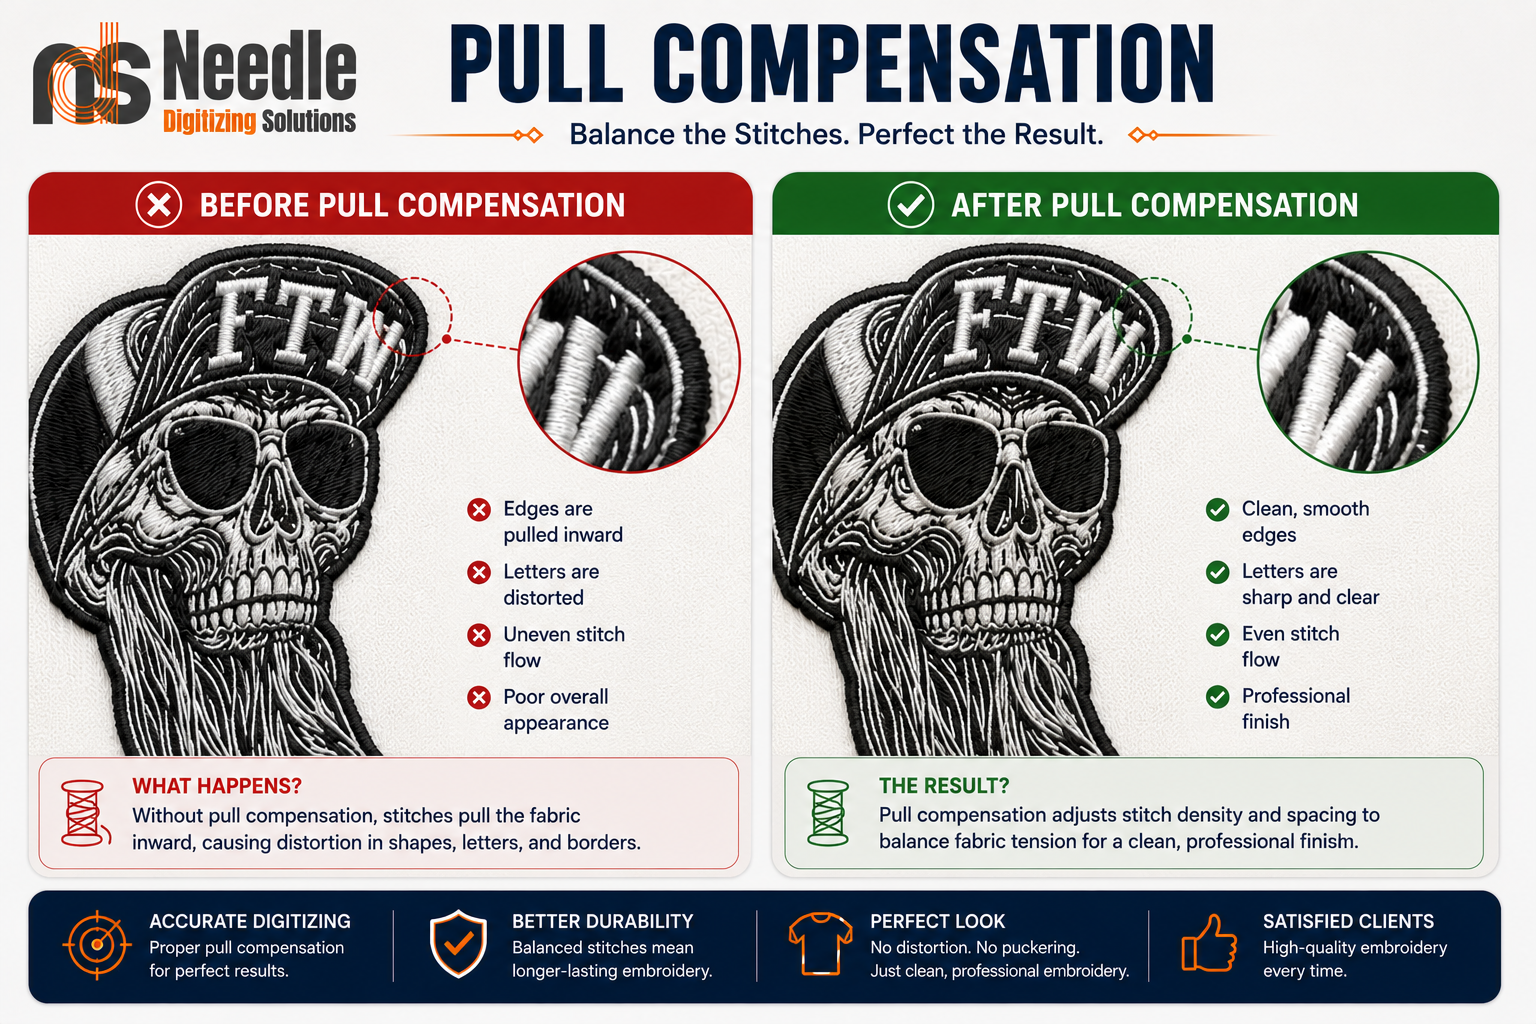
Picture:8- Pull compensation.
Step 7: Export the Correct Machine Format
Provide a table of common embroidery file formats.
Machine Brand Format
Tajima DST
Brother PES
Janome JEF
Melco EXP
Husqvarna Viking VP3
Bernina ART
Explain that the design itself is the same, but each machine brand reads a different file format.
Common Problems During Logo Conversion
Cover issues such as:
Thread breaks
Bird nesting
Puckering
Registration errors
Gaps
Poor lettering
Uneven fills
For each problem, explain:
Why it happens.
How a professional digitizer prevents it.
Frequently Asked Questions
Answer questions like:
Can I convert a JPG to a DST file?
Is automatic digitizing good enough?
Which file format should I request?
How long does digitizing take?
Can one embroidery file work on every machine?
Why does my logo look different in embroidery?
Why do small letters need simplification?
Conclusion
Conclude by emphasizing that converting a logo into an embroidery file is not a one-click process. It requires technical expertise, testing, and careful planning to ensure a clean stitch-out on real garments.
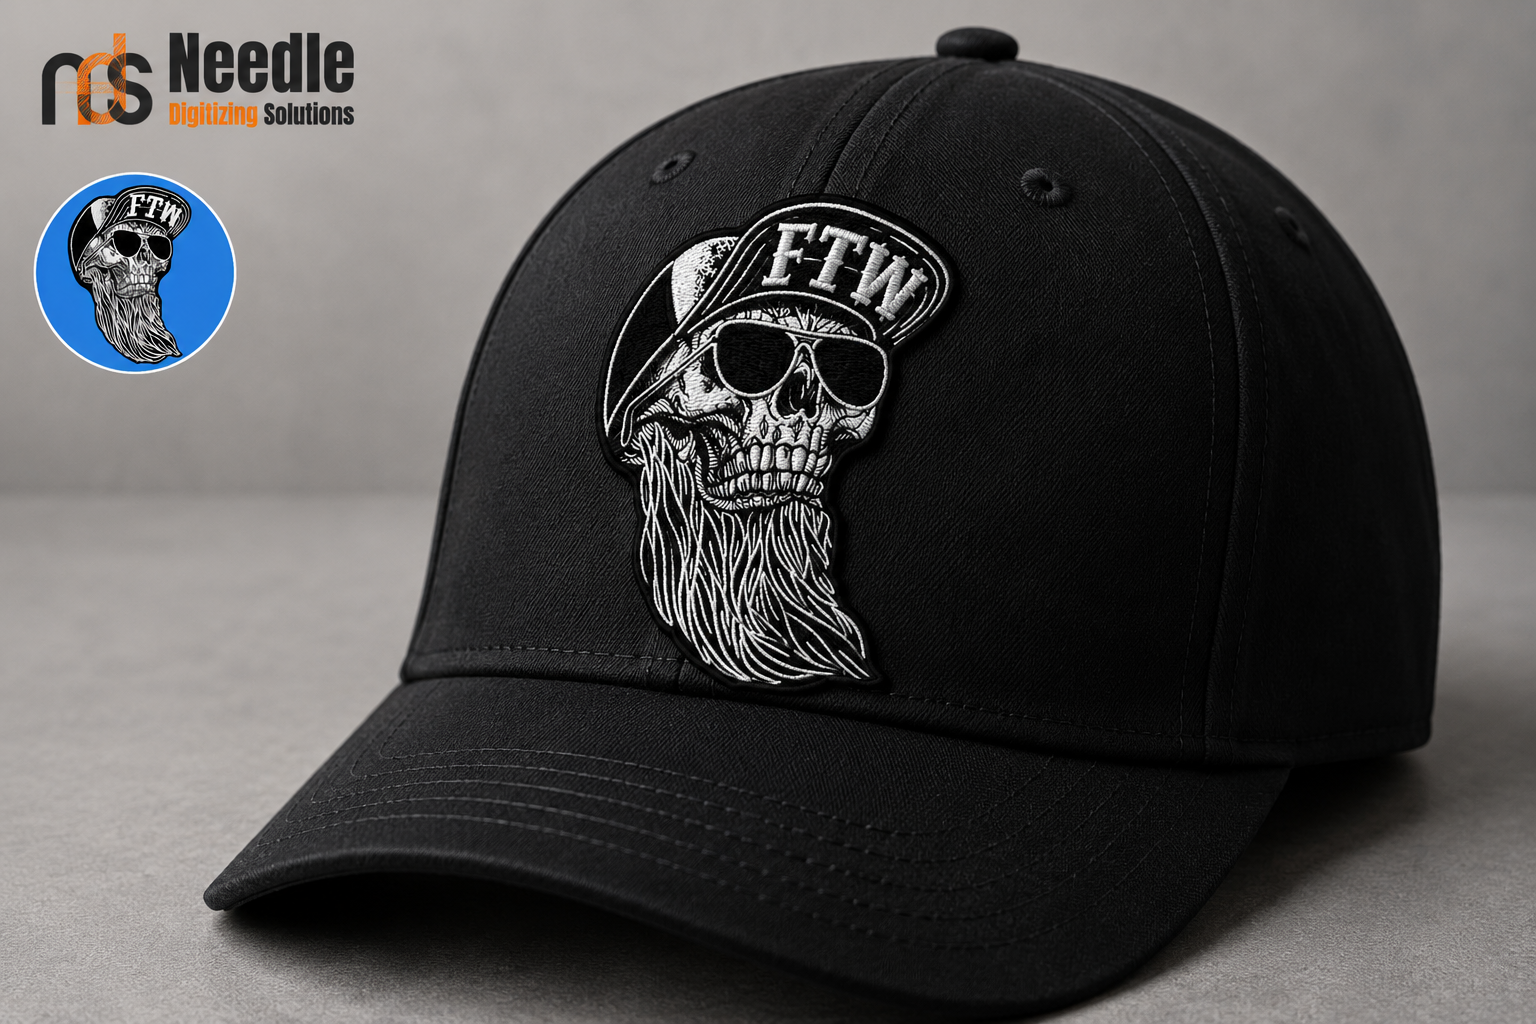
End with a call to action:
Need a professional embroidery file for your logo? Needle Digitizing creates high-quality, machine-ready embroidery files with fast turnaround, optimized stitch paths, and support for all major embroidery machine formats. Contact us today for a free quote.
Tags: