Convert Image to JEF File: A Complete Guide for Janome Embroidery Machines
If you own a Janome embroidery machine, one of the most important steps before stitching a design is learning how to convert an image to a JEF file. The JEF format is the native embroidery file format used by Janome machines
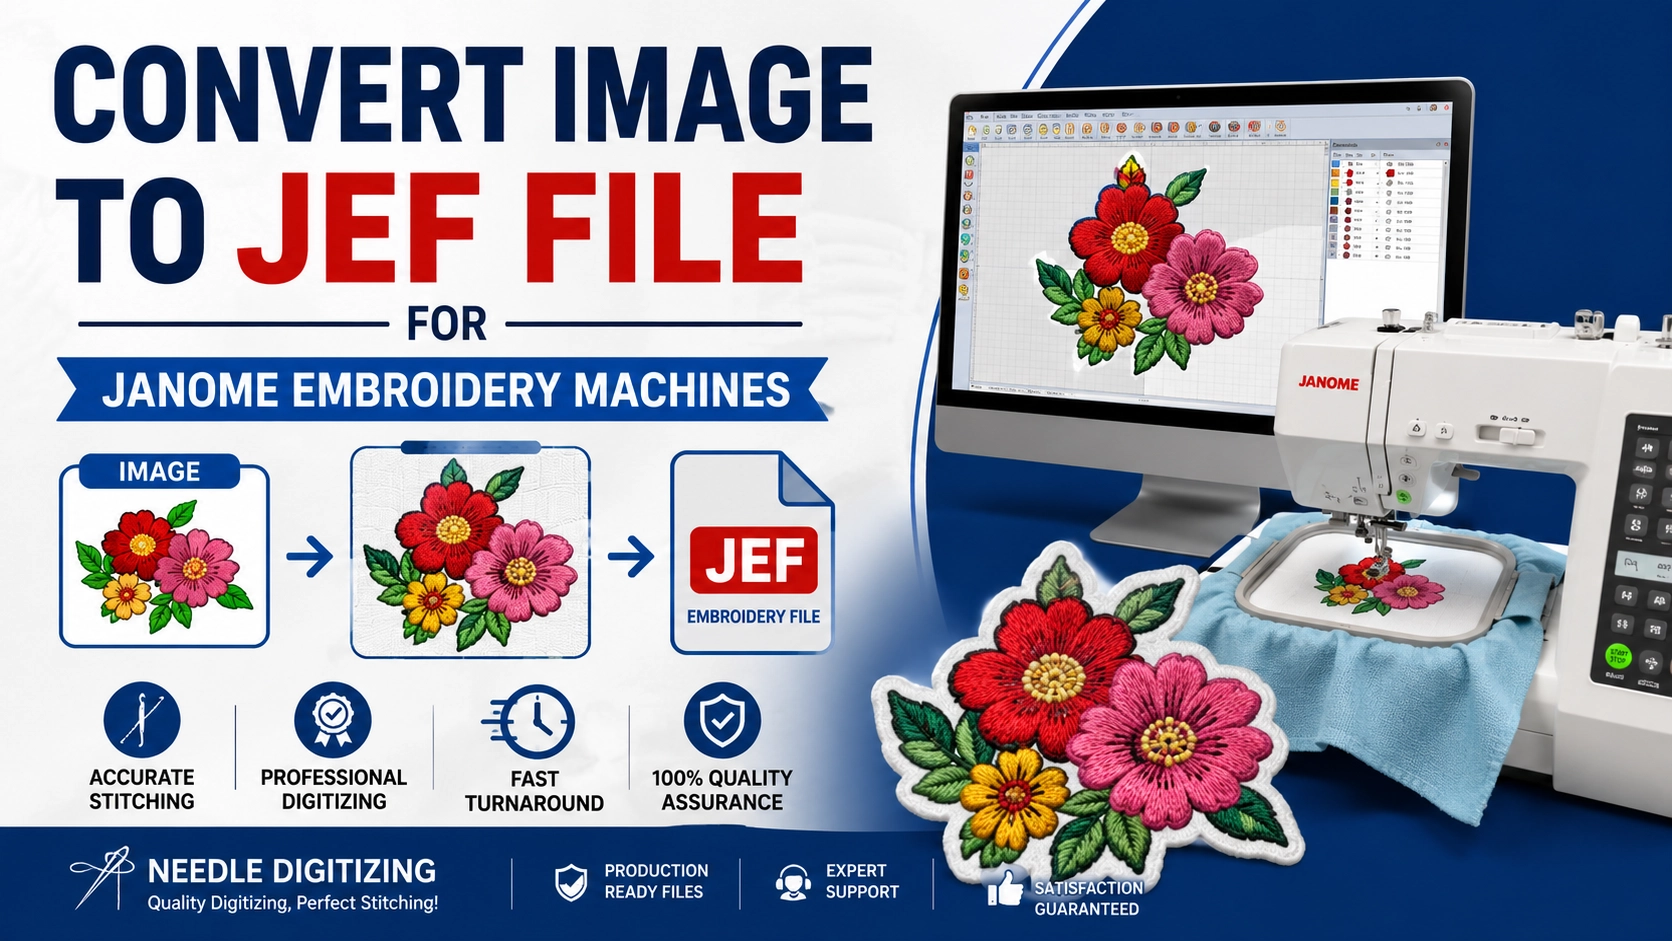
Convert Image to JEF File for Professional Embroidery Results
If you own a Janome embroidery machine, one of the most important steps before stitching a design is learning how to convert an image to a JEF file. The JEF format is the native embroidery file format used by Janome machines, allowing your embroidery machine to read stitch information accurately and produce high-quality embroidered designs.
Many beginners assume that changing a JPG or PNG image extension to .JEF will make it embroidery-ready. However, embroidery files require stitch paths, thread color information, density settings, and machine-readable commands. This process is known as embroidery digitizing.
In this guide, we'll explain how to convert an image to a JEF file, why professional digitizing matters, and how expert digitizing services can help you achieve flawless embroidery results.
What Is a JEF File?
A JEF file is an embroidery design format specifically created for Janome embroidery machines. Unlike standard image formats such as JPG, PNG, BMP, or SVG, a JEF file contains:
Stitch directions
Stitch types
Thread color information
Needle sequence data
Design dimensions
Machine-readable embroidery instructions
Without proper digitization, an embroidery machine cannot interpret a regular image file.
Why You Cannot Directly Convert an Image to JEF
A common misconception is that embroidery files are simply images. In reality, embroidery machines require precise stitch instructions.
For example:
JPG files contain pixels.
PNG files contain pixels with transparency.
SVG files contain vector paths.
JEF files contain embroidery stitch data.
Because of this difference, every image must be manually or automatically digitized before being saved as a JEF embroidery file.
How to Convert Image to JEF File
Step 1: Choose a High-Quality Image
The quality of your final embroidery design depends heavily on the source image. For best results:
Use high-resolution images.
Avoid blurry graphics.
Select clear logos and artwork.
Use vector files when available.
Step 2: Import the Image into Digitizing Software
Professional embroidery software can convert artwork into embroidery stitches.
Popular software includes:
Wilcom Embroidery Studio
Hatch Embroidery
Janome Digitizer
Pulse Embroidery Software
Embrilliance
The image is imported and prepared for digitization.
Step 3: Digitize the Design
This is the most important stage.
A digitizer manually assigns:
Satin stitches
Fill stitches
Running stitches
Underlay stitches
Pull compensation
Stitch density
Proper digitizing ensures clean embroidery with minimal thread breaks.
Step 4: Optimize for Janome Machines
Every embroidery machine behaves differently. Professional digitizers adjust settings specifically for Janome embroidery machines to ensure:
Smooth stitching
Proper thread coverage
Reduced puckering
Accurate lettering
Better design durability
Step 5: Save as a JEF File
Once digitization is complete, the design is exported as a JEF file and tested before production.
The file can then be transferred to your Janome embroidery machine using USB or compatible transfer methods.
Benefits of Professional JEF Digitizing
Superior Stitch Quality
Professional digitizers create clean stitch paths that improve the appearance of your embroidered design.
Reduced Thread Breaks
Well-digitized embroidery files minimize unnecessary trims and thread breaks during production.
Better Fabric Compatibility
Different fabrics require different stitch settings. Professional digitizing helps ensure excellent results on:
Polo shirts
Caps
Jackets
Towels
Bags
Uniforms
Accurate Logo Reproduction
Businesses often require exact logo replication. Professional JEF digitizing maintains brand consistency and embroidery quality.
Common Images Converted to JEF Files
Many customers request JEF conversion for:
Company logos
Sports team logos
Monograms
Custom artwork
School emblems
Patch designs
Promotional products
Personal embroidery projects
Whether the design is simple or complex, proper digitizing is essential for achieving professional embroidery results.
Image Formats That Can Be Converted to JEF
Professional digitizing services can typically convert:
JPG to JEF
JPEG to JEF
PNG to JEF
BMP to JEF
PDF to JEF
SVG to JEF
AI to JEF
EPS to JEF
The cleaner the source file, the better the embroidery outcome.
Why Choose Professional Embroidery Digitizing Services?
Automated conversion software often creates excessive stitches, poor stitch directions, and inaccurate embroidery results.
Professional digitizers:
Analyze artwork manually
Optimize stitch sequencing
Reduce production errors
Improve machine efficiency
Deliver production-ready JEF files
This ensures your embroidery design stitches correctly on the first run.
Convert Image to JEF File with Needle Digitizing
At Needle Digitizing, we specialize in converting logos, artwork, and custom graphics into high-quality JEF embroidery files for Janome embroidery machines.
Our experienced digitizers provide:
Fast turnaround times
Production-ready JEF files
High stitch quality
Competitive pricing
Professional embroidery digitizing support
Whether you need a simple monogram or a detailed corporate logo, our team can create a JEF file optimized for smooth embroidery production.
Final Thoughts
Converting an image to a JEF file requires much more than changing a file extension. A professional digitizing process transforms your artwork into machine-readable embroidery instructions that produce clean, accurate, and durable stitching.
If you want the best embroidery results on your Janome machine, professional embroidery digitizing is the most reliable solution. By choosing expert JEF conversion services, you can ensure your designs stitch beautifully while reducing production issues and machine downtime.
Tags: